
If you are interested on how to get a free SSL for GoDaddy. Then you have come to the right place.
Having a secure website is one of the primary concerns for a starter blogger nowadays.
Aside from the security benefits that an SSL certificate provides. There is just something more appealing to a website with a secured icon on its URL.
It also makes your visitors feel more comfortable in filling up your forms and leaving their sensitive data with you.
However, we all know that an SSL certificate cost money in order to obtain.
Some SSL certificates only cost around $9/year to get but the most expensive ones can cost around $100/year to $200/year.
But what if I tell you that you could actually get one for free and renew also for free.
Yes, it is true. This SSL certificate is provided by Let’s Encrypt which is a free, automated and open Certificate Authority.
And thankfully GoDaddy is one of the hosting providers that will allow you to install this kind of SSL certificate hassle free.
The only difference is instead of renewing your SSL yearly. Let’s Encrypt will require you to renew your SSL every 3 months.
Here is your step-by-step guide on how to get a free SSL for GoDaddy.
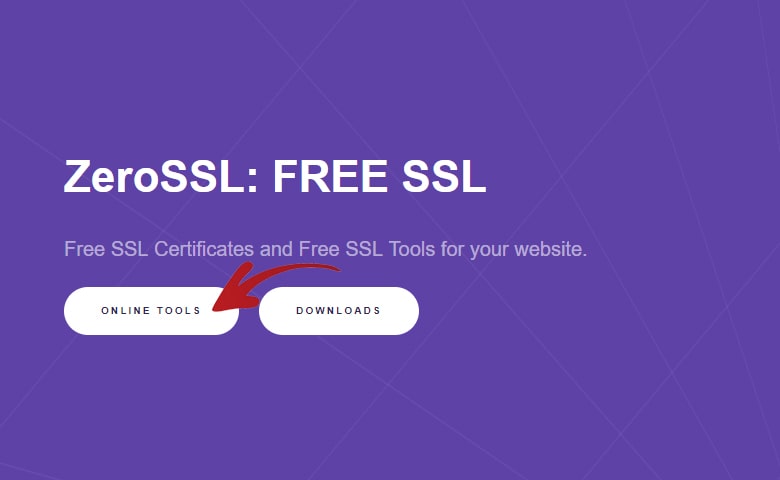
1. Go to ZeroSSL.com
The very first step is to go to ZeroSSL.com.
Basically it is one of the most popular websites that automates the process of generating the Let’s Encrypt SSL certificates.
Once you are in the homepage page, click the Online Tools button.
It will the scroll you down to this section. Click the Start button.
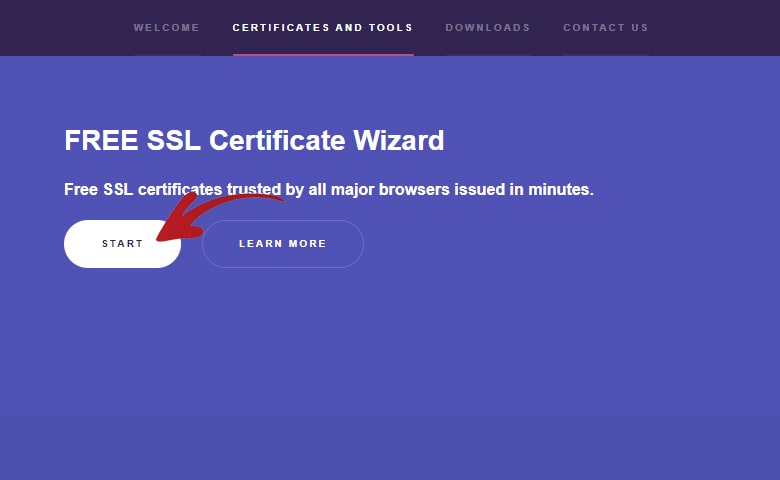
The page will then reload and bring you to the page with the step-by-step process in order to generate your SSL certificate.
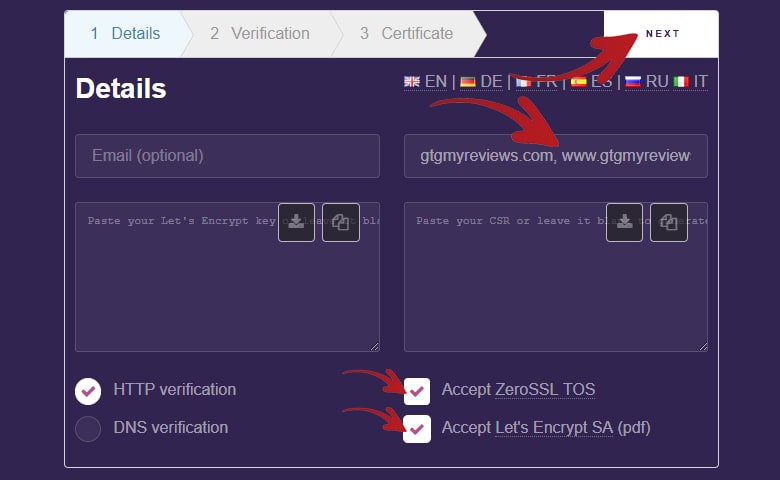
2. Website Details
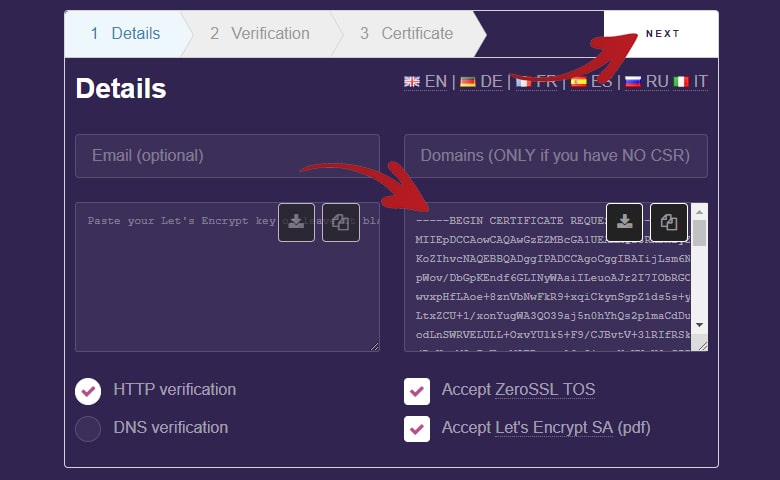
The very first step in the process is for you to fill up the Domains field.
You also have to include both the non-www version and www version of your domain separated by a comma.
For instance, I filled up mine with:
gtgmyreviews.com, www.gtgmyreviews.com
Next is you need to check both the Accept ZeroSSL TOS and Accept Let’s Encrypt SA checkboxes.
After this, you can now click the Next button.
A popup will then show saying Generating CSR. Just wait for the generating process to finish.
As soon as the generating process is complete. A popup box will show on the bottom right corner confirming it.
Also the right textarea box will now be populated with texts.
You can now click the Next button again.
A popup will show again saying Generating Account Key. Just wait for the generating process to finish again.
As soon as it is finished. A popup will show on the lower right side again with the confirmation.
Also this time, the left textarea box will be the one who gets populated with texts.
You can now click the download icons on the top right side of each textarea box to download a copy of your Domain CSR and Account Key files.
This is required before you can proceed to the next step.
After you downloaded the files mentioned above. You should now be able to click the Next button.

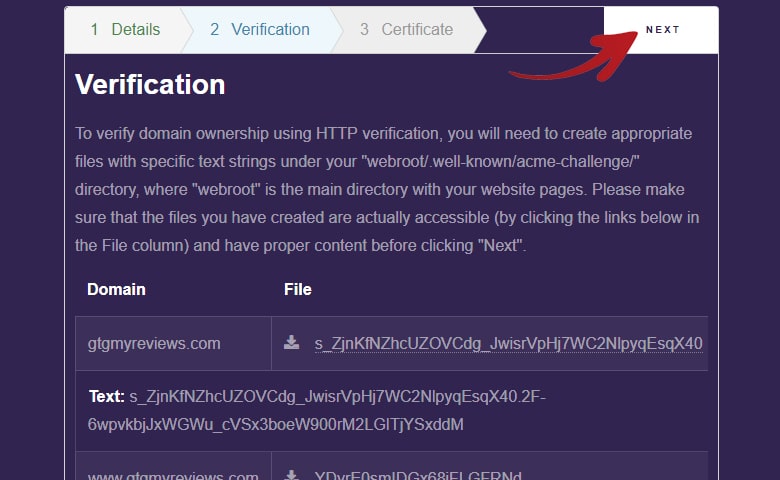
3. Download Ownership Verification Files
The next step is to prove that you own the domain by downloading and uploading the files provided by ZeroSSL.com to your website.
Basically we would need to upload the two files pointed at the image below to the root/.well-known/acme-challenge folder.
Now let us download the files by clicking the two download icons below.
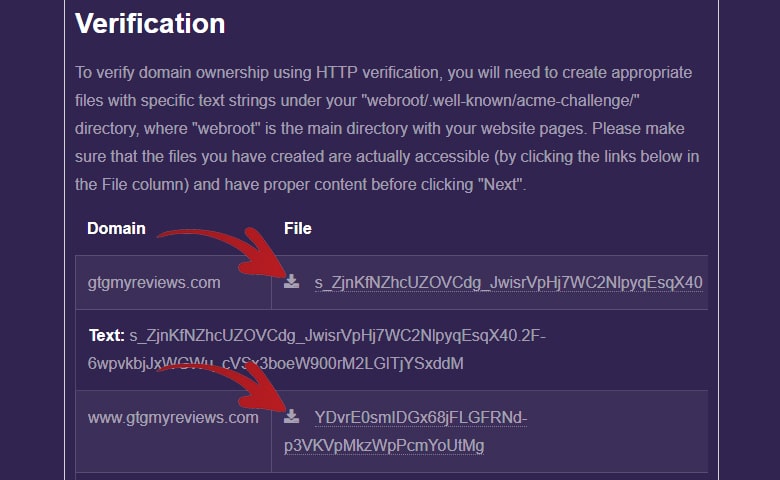
Take note of where you download the files as we will browse to that directory later to upload the files.
4. Upload Ownership Verification Files
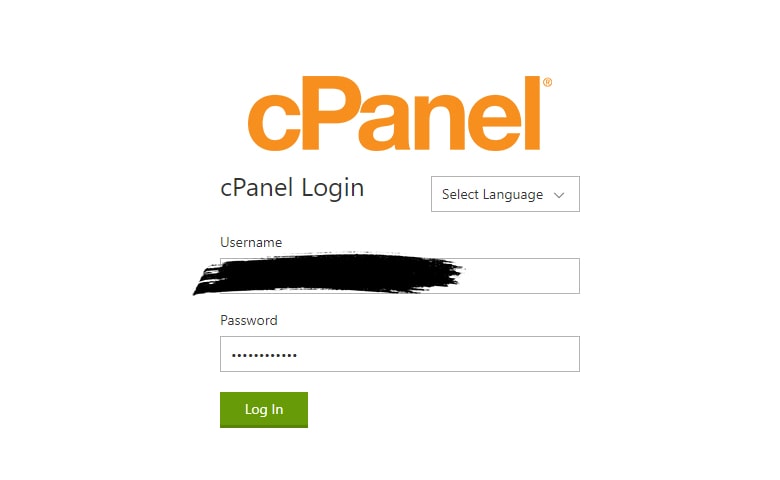
Next is let us log-in to our GoDaddy cPanel.
The shortcuts I use to get to the cPanel login page is either www.yourdomain.com/cpanel or www.yourdomain.com:2083
Once you are in the cPanel log-in page, fill up your log-in details and click Log-In.
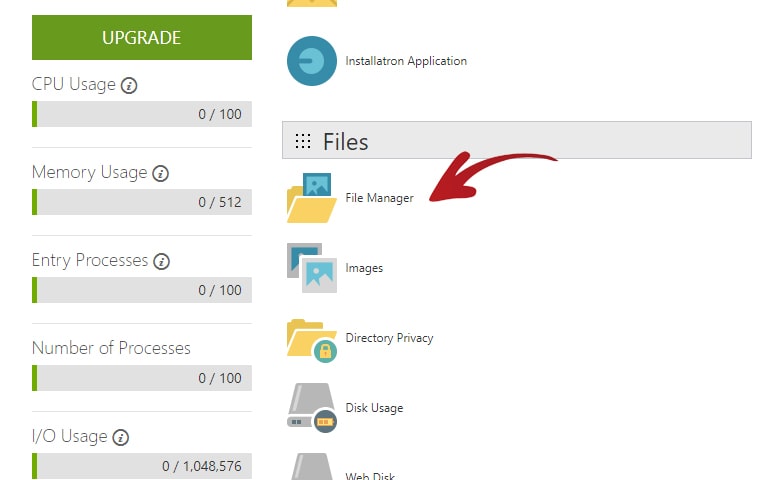
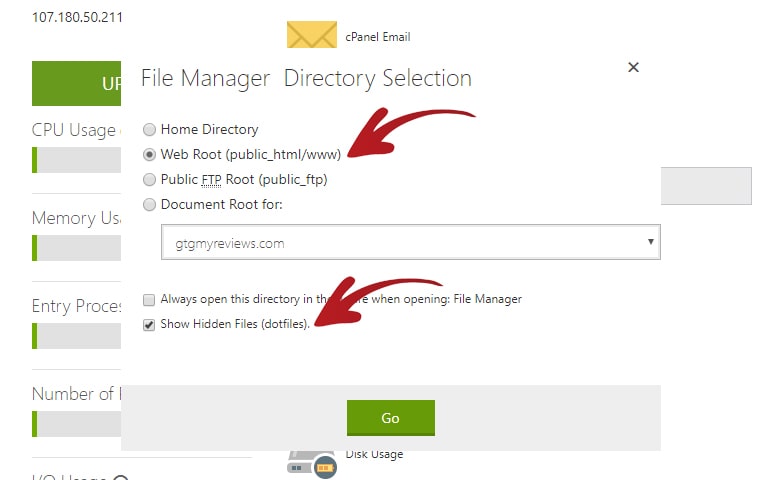
Inside the GoDaddy cPanel, find and click the File Manager link.
It will then show you this popup.
Make sure to choose the Web Root (public_html/www) and also check the Show Hidden Files (dotfiles).
Then click the Go button.
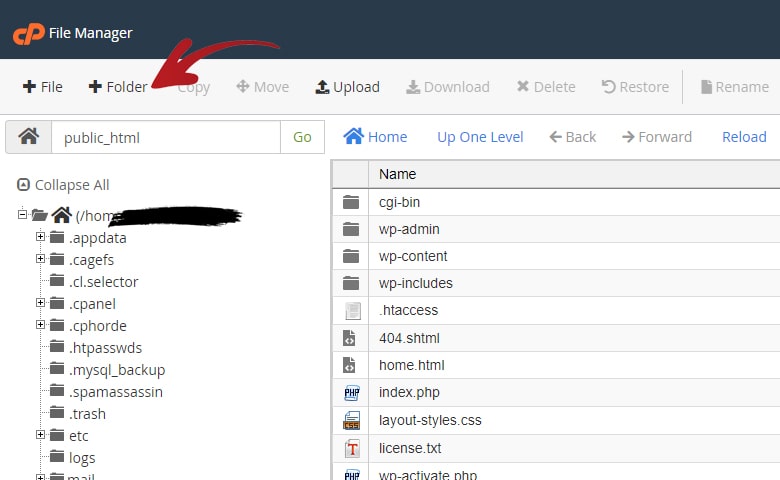
The File Manager will then open and it should look like this if you have WordPress installed.
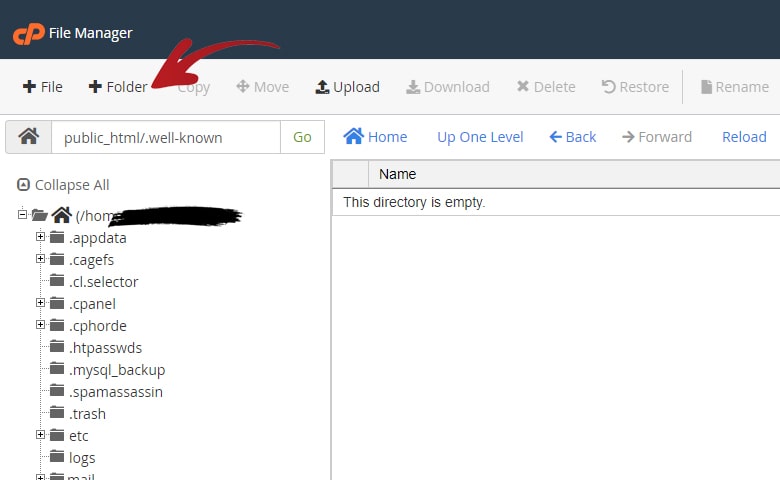
As you can see there is no .well-known folder yet. Some hosting providers have this folder created by default. But not here in GoDaddy.
So let us proceed on creating one.
Click the Add Folder link on the top left corner.
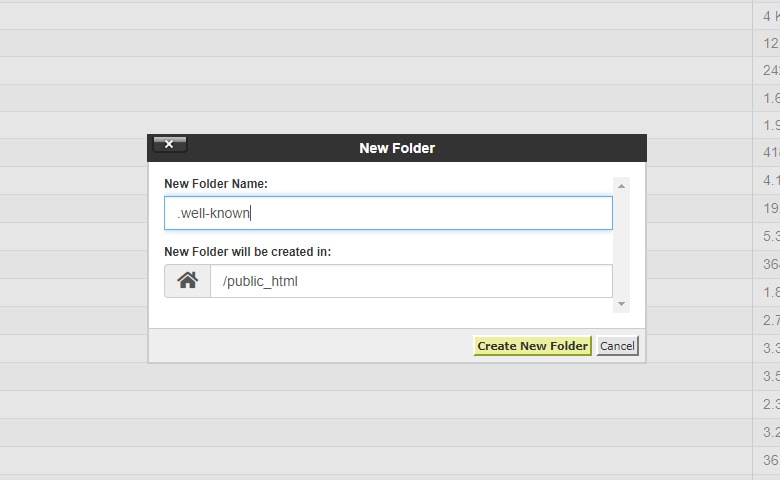
It will open this popup box.
In the New Folder Name type in .well-known then click the Create New Folder button.
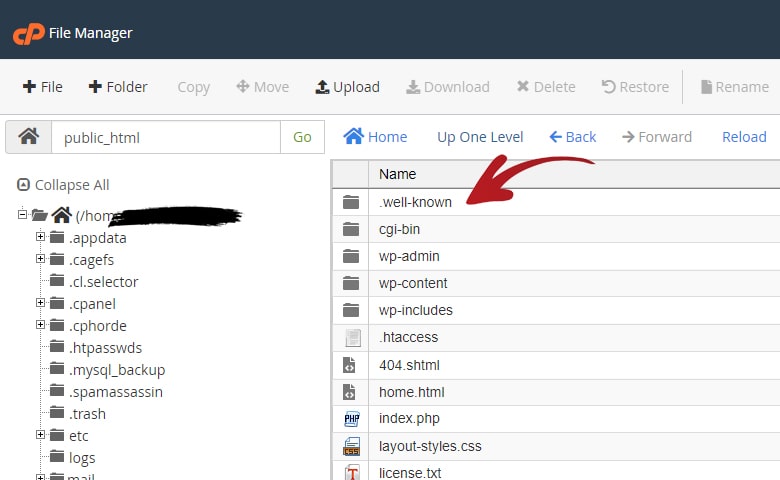
The File Manager will then reload and when it is done you should now be able to see the .well-known folder.
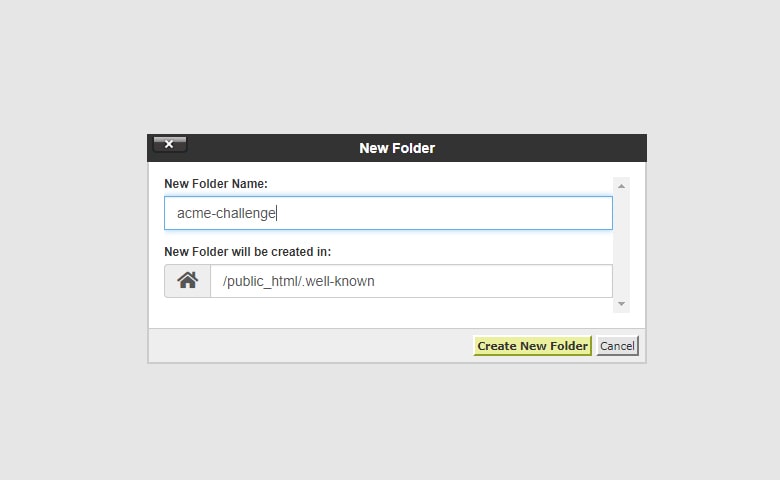
Now open the .well-known folder by double-clicking on it.
You should now be greeted by this empty .well-known folder directory.
Click the Add Folder link on the top left corner again.
You should be greeted by this popup box again.
On the New Folder Name type in acme-challenge then click the Create New Folder button.
The File Manager will then reload and once it is done. You should now see this acme-challenge folder.
Now open the acme-challenge folder by double-clicking on it.
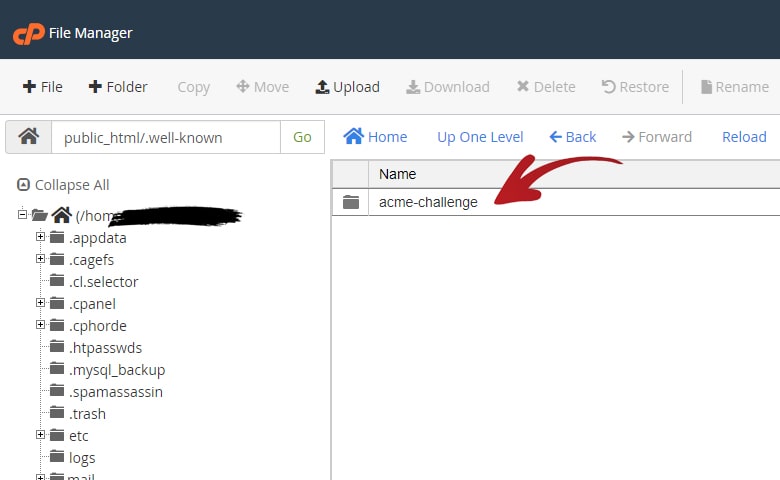
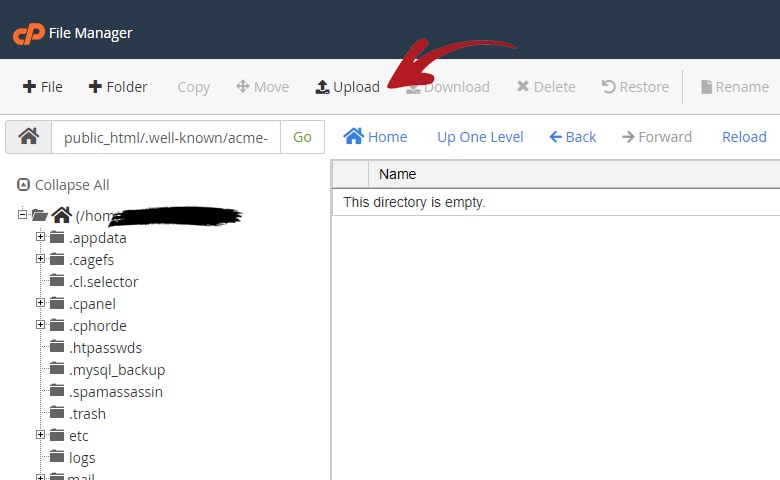
You should now be inside the empty acme-challenge folder.
This is where we will upload the 2 verification files we downloaded earlier from ZeroSSL.
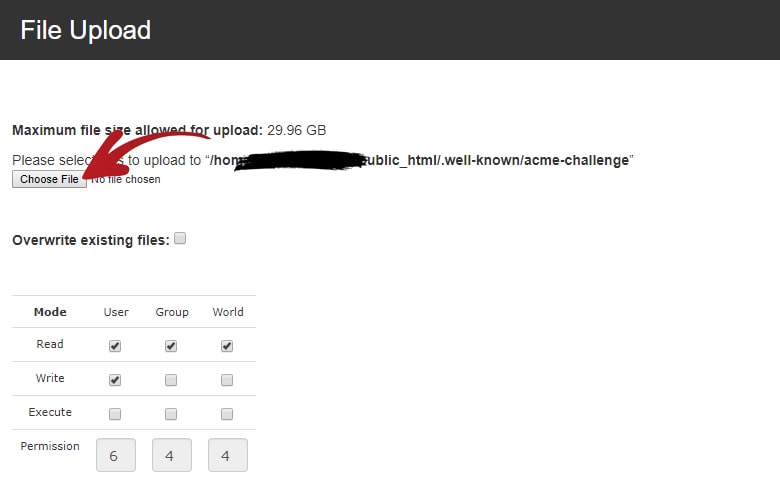
Now click the Upload button.
You should now be redirected to this File Upload page.
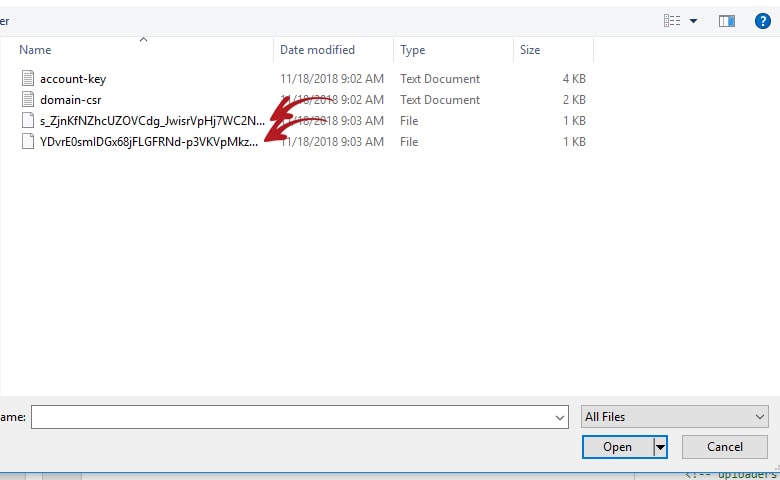
Click the Choose File button and look for the 2 files we downloaded earlier.
In my case, I downloaded them on a specific folder so it looks like this.
The files we will need to upload are named similar to the files being pointed at below.
Choose the file you need to upload and click the Open button. Do the same for the second file.
Once you uploaded both of them. You should now see these 2 confirmation boxes on the lower right side.
You can now click the long Back To link being pointed at below.
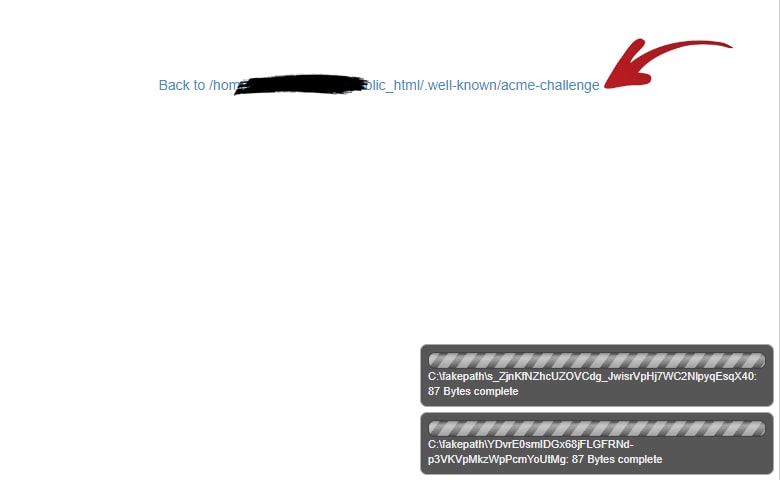
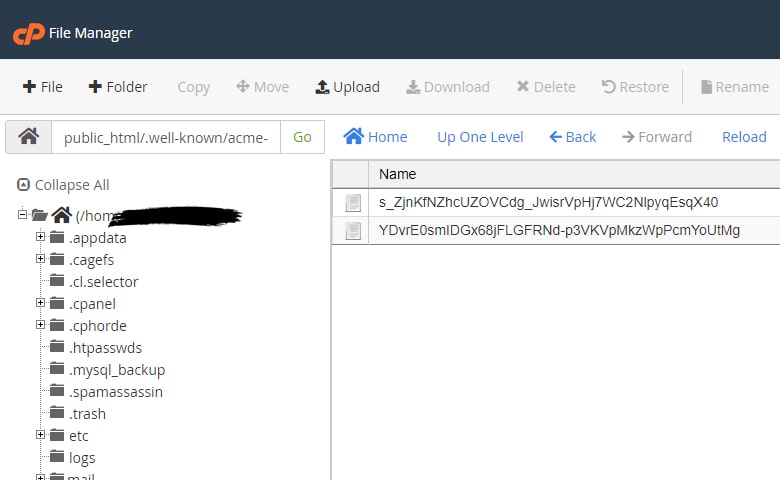
You will now be redirected back to the acme-challenge folder and this time you should now see the 2 files we just uploaded.
We can now go back to the ZeroSSL.com verification step page.
5. Finishing Ownership Verification
Back in the ZeroSSL.com verification step.
We can now click the Next button to finish the verification.
You can actually test out if you uploaded the files in the correct directory. You can click the long text links beside the download buttons we clicked earlier.
If the link opens and the page contains a long string of text then that means that you uploaded them in the correct directory.
If the verification process is successful.
You will be redirected to the Certificate step page and be greeted by this Your certificate is ready! message.
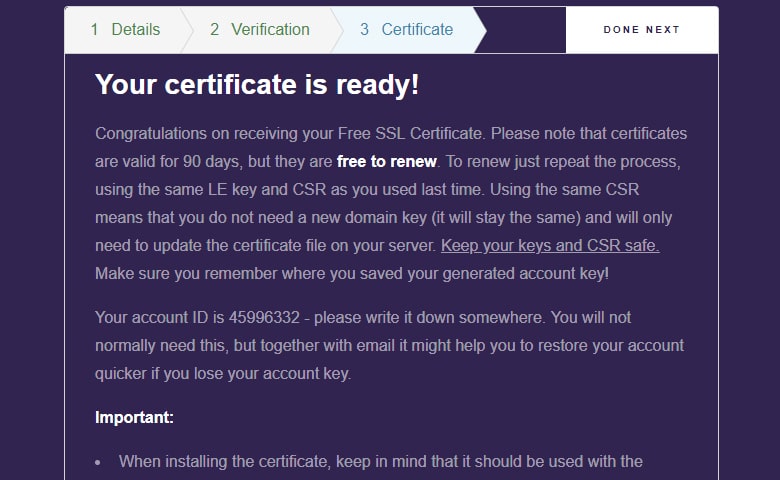
Congratulations! Now you have generated your free SSL.
Now let us download them and install them in GoDaddy.
6. Download the SSL Certificate Files
The next step is to download the SSL certificate files you generated.
To do this, scroll down on the Certificate step page until you see this section.
Now click on the download buttons to download your SSL certificate files.
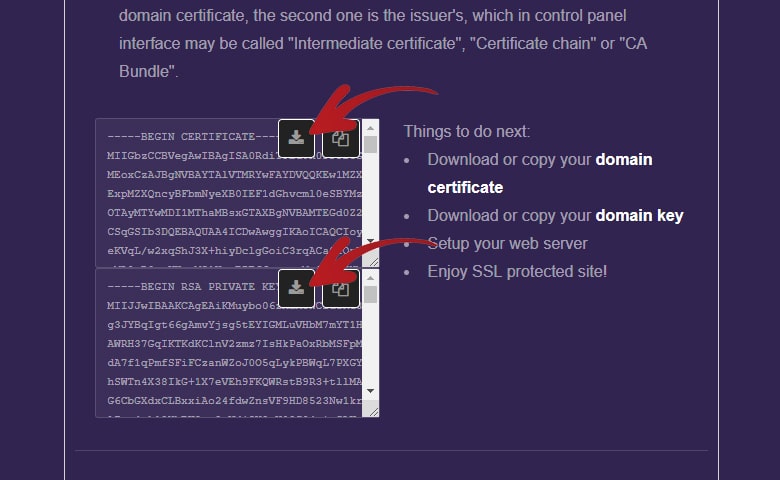
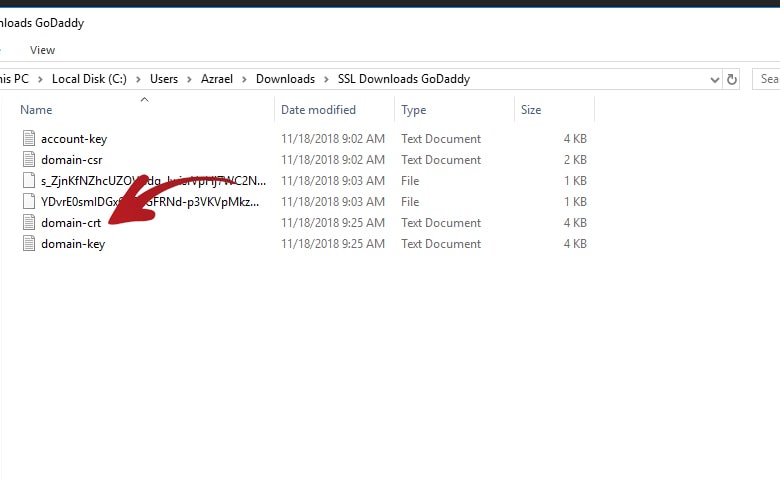
Take note of where you downloaded these files as we will open them and copy the texts inside them.
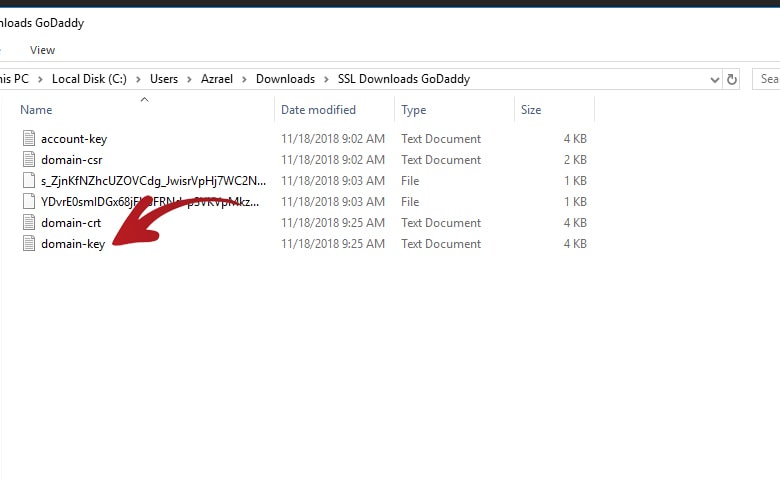
These files are named domain-crt and domain-key.
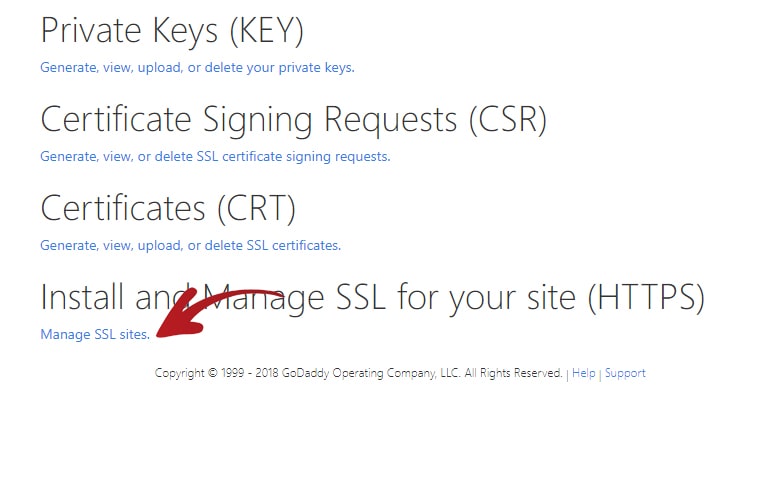
7. Installing the SSL Certificate to GoDaddy
As we now have the SSL certificate files. We can now proceed on installing them to GoDaddy.
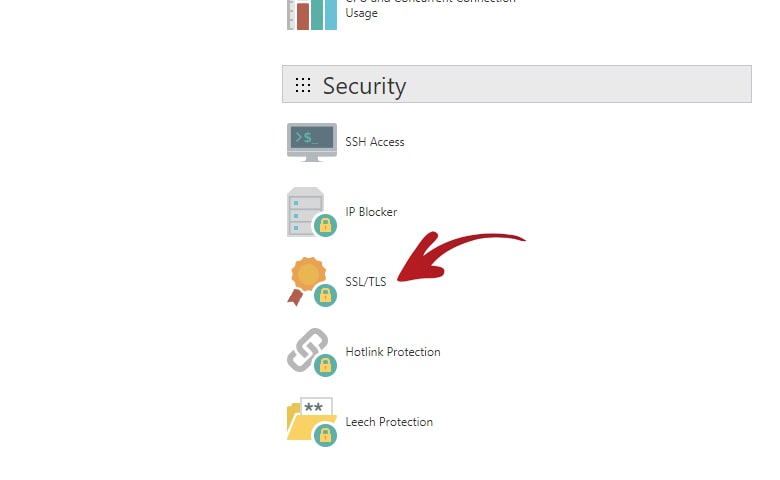
We now need to go back to the GoDaddy cPanel.
Once inside, find and click the SSL/TLS link.
On the next page, find and click the Manage SSL Sites link.
It is usually found at the bottom of the page.
On the next page, scroll down until you see this section with dropdown and 3 textarea fields.
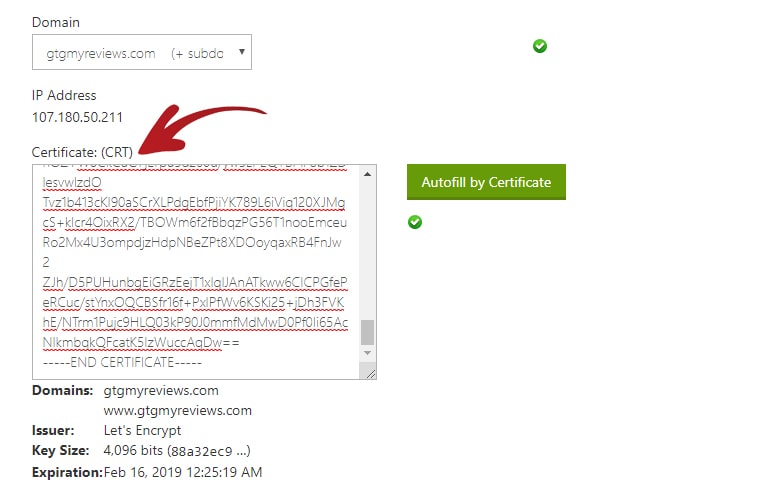
Choose the domain name you want to install your SSL certificate into in the Domain dropdown.
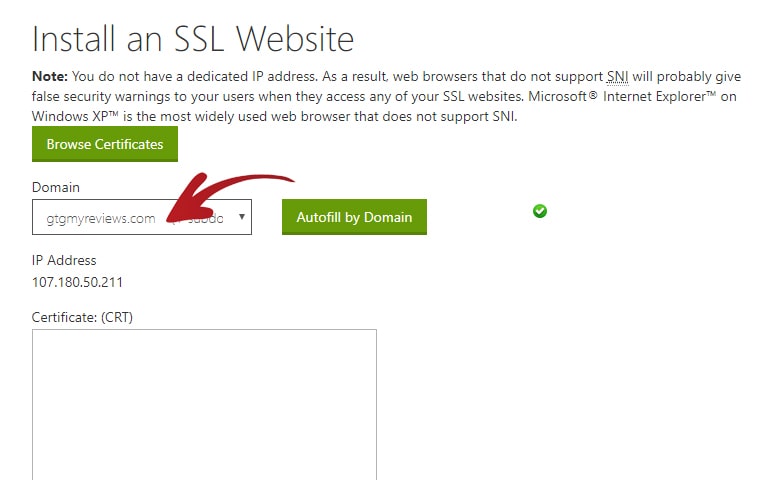
Now let us proceed in opening the files we downloaded earlier and copy their contents to the 3 textarea fields.
Now you may be wondering because we only downloaded 2 files but this page has 3 textarea fields to fill. Do not worry as one of the files actually have 2 certificate texts on it.
The first file we will open is named domain-crt.
You can choose Notepad or WordPad to open the file. In my case I prefer using the Sublime Text 3 text editor so it looks like this.
As you can see in the image below this file has 2 certificates.
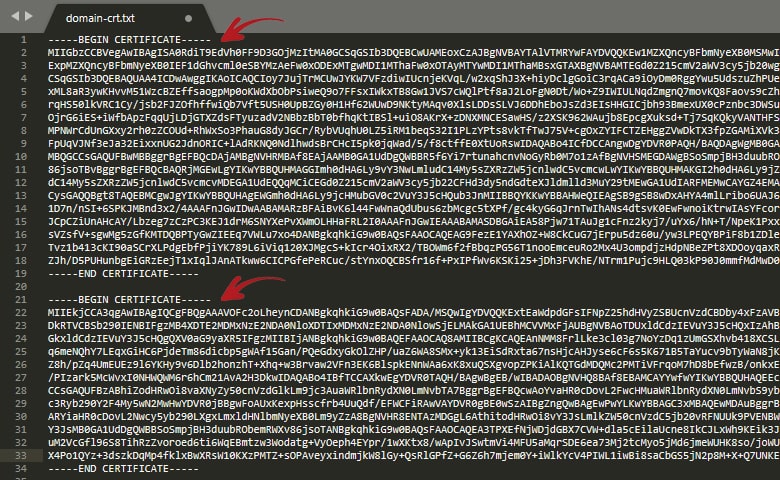
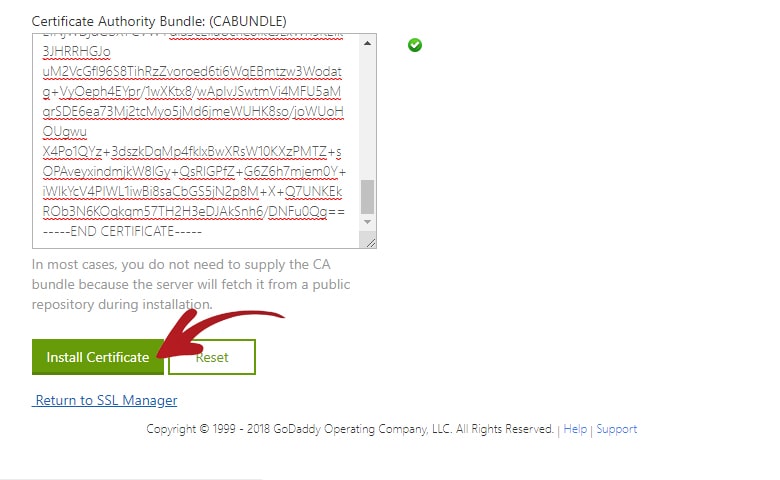
Copy all the text of the top certificate and paste it on the Certificate (CRT) textarea field.
Next is copy all the text of the bottom certificate and paste it on the Certificate Authority Bundle (CABUNDLE) textarea field.
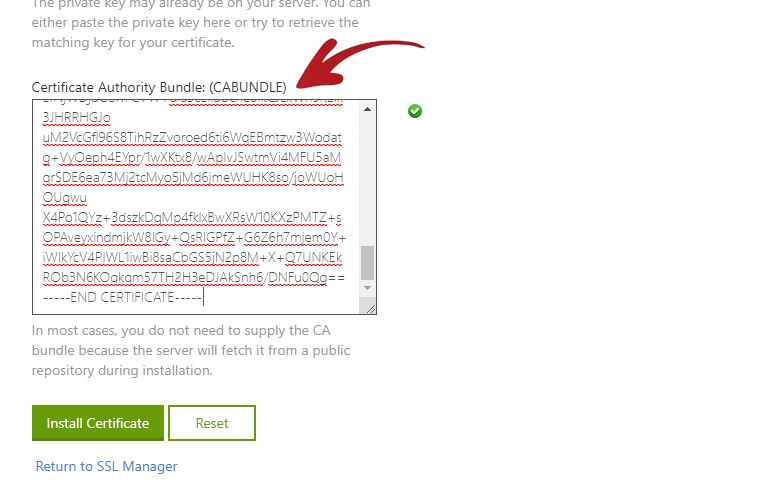
We can now close the domain-crt file and proceed on opening the second file.
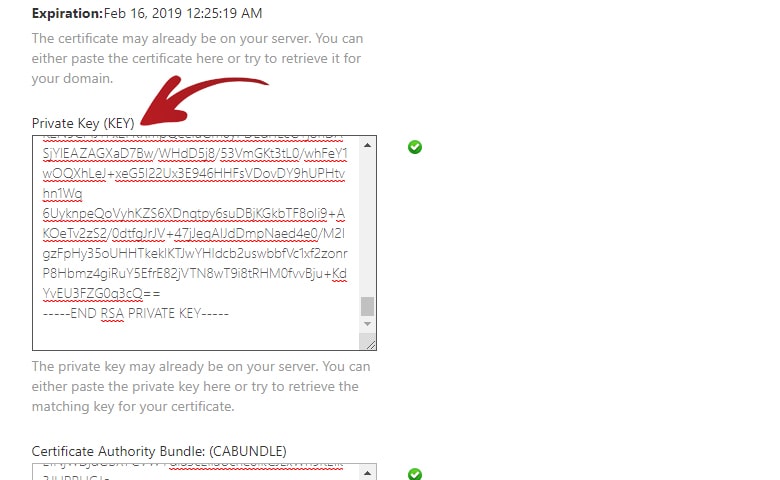
The second file we will need to open is named domain-key.
Open it again with your preferred text editor. In my case, I will open it again using Sublime Text 3.
This files only has 1 certificate texts so you just need to copy everything in this file.
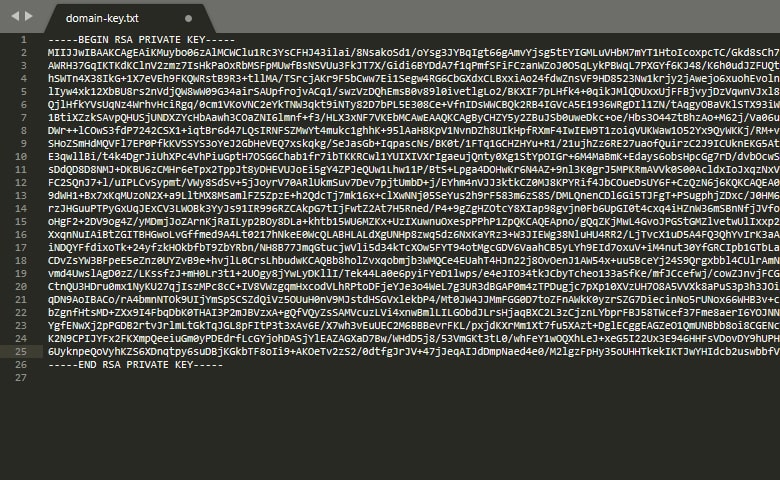
After copying go back to the Manage SSL Sites page and paste it on the Private Key (KEY) textarea field.
That is it! We can now scroll down to the bottom of the page and click the Install Certificate button.
It will then show you a loading bar saying that the installation of your certificate is in progress.
Just wait for it to finish. As soon as it is done you will see this popup confirming that the SSL certificate is successfully installed.
You can now click the OK button on this popup.
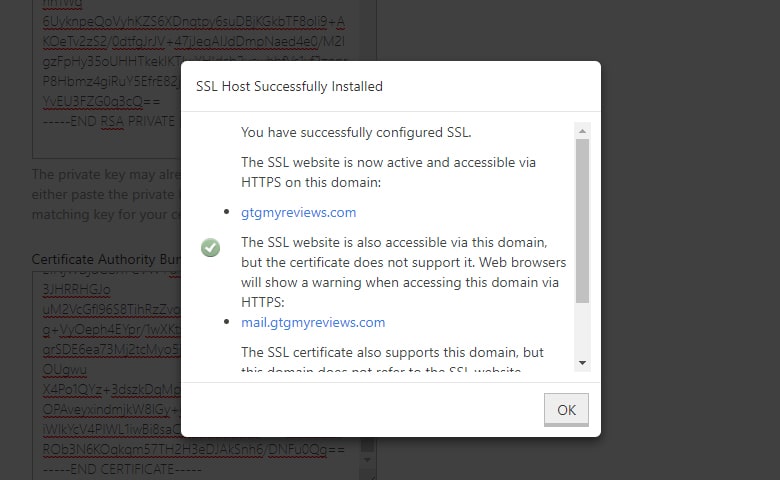
Congratulations! Now you have an SSL installed to your domain.
We can now work on getting your WordPress website SSL ready and compatible.
8. Getting WordPress SSL Compatible
The next step is we need to update our WordPress settings so it will always redirect to the HTTPS URL.
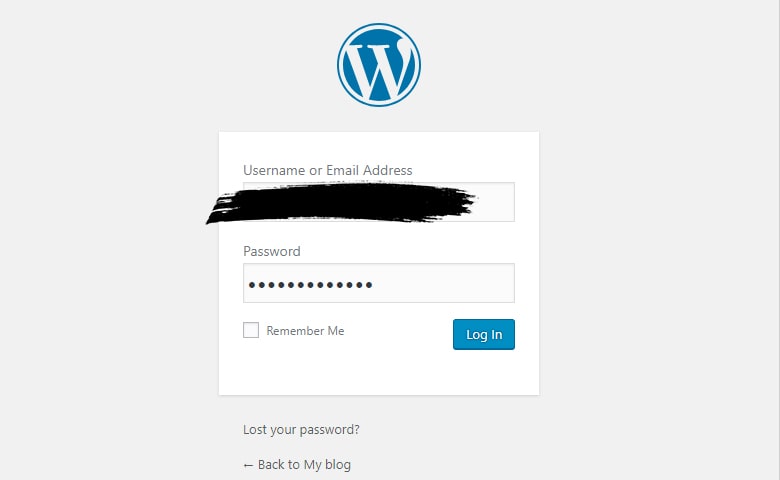
In order to do this log-in to your WordPress dashboard first.
The shortcut to get to your WordPress dashboard is www.yourdomain.com/wp-admin
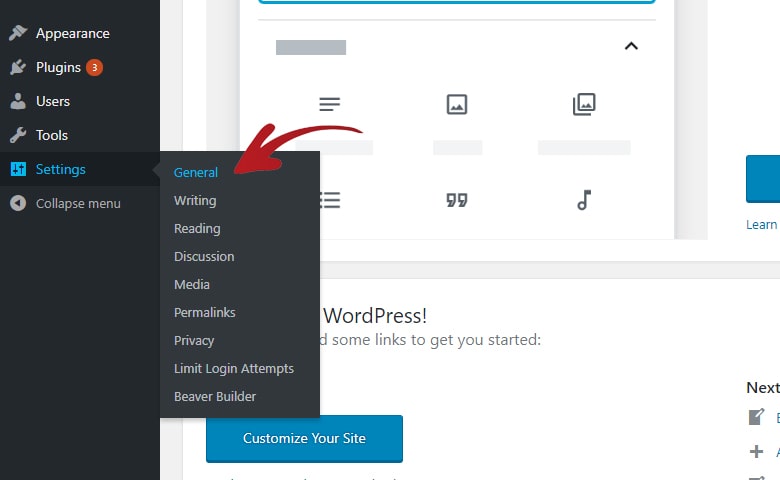
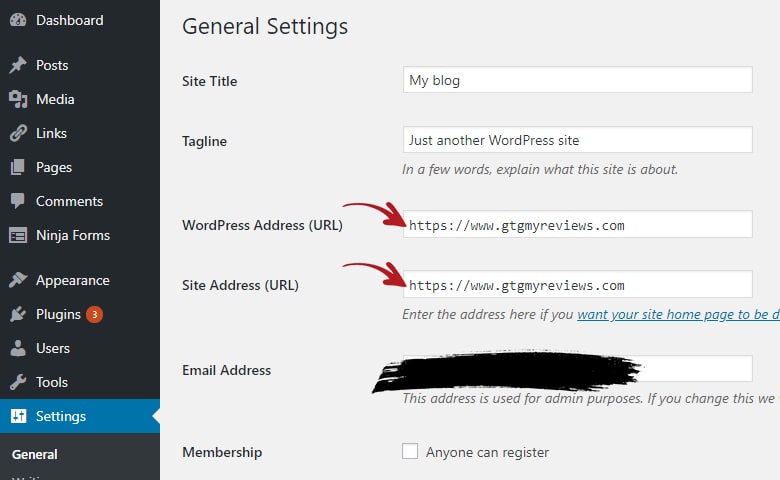
Once inside the WordPress dashboard, navigate to the Settings > General section.
The settings we need to update here are the WordPress Address and Site Address text fields.
What you need to do here is convert the http://yourdomain.com to https://www.yourdomain.com
In my case I converted it from http://gtgmyreviews.com to https://www.gtgmyreviews.com
The www is optional. There are some bloggers who prefer to add www like me but there are also others who prefer not to add it. It is all up to you.
After you finish updating the 2 text fields you can now scroll down and click the Save Changes button.
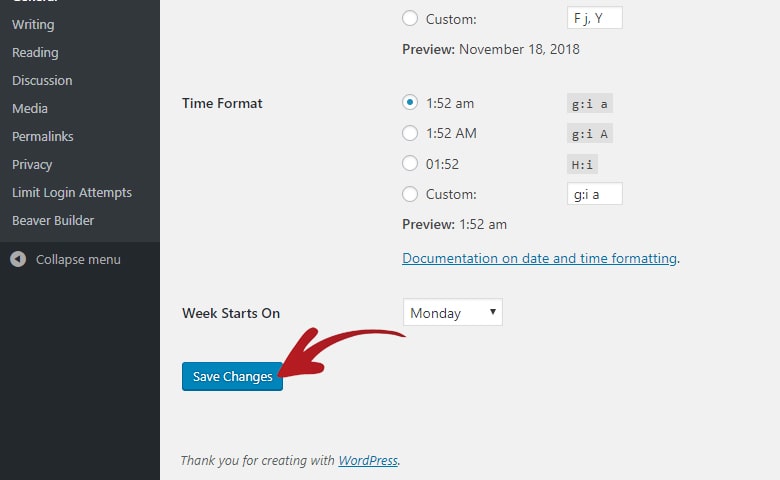
You will be automatically logged out after this because the URL updates also affect the WordPress dashboard URL address.
Just log-in again to proceed to the next step.
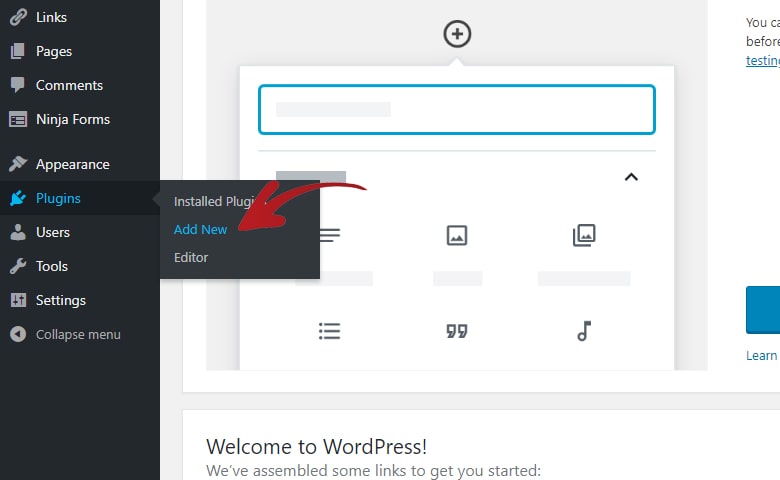
9. Install Really Simple SSL Plugin
The final step is to install the Really Simple SSL plugin.
Basically what this plugin does is it will automatically convert all your media links to HTTPS.
Instead of manually finding them and editing them yourself. Thus saving you a lot of time in the process.
Let us proceed to the installation.
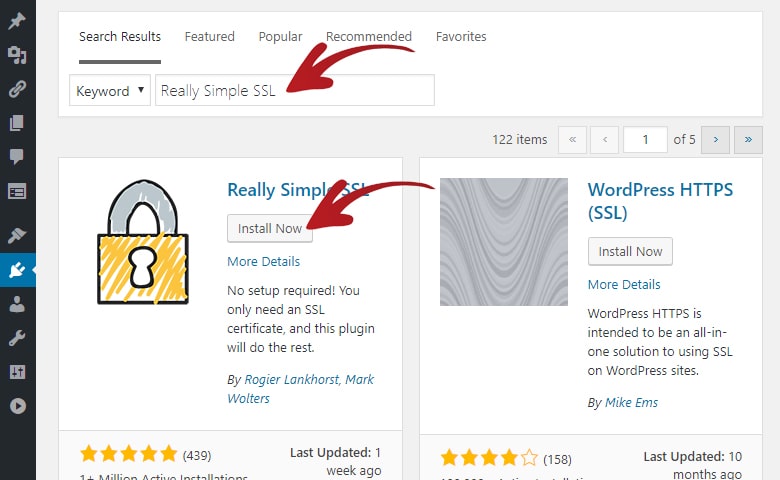
To do this, navigate to Plugins > Add New section.
Type Really Simple SSL in the search box and the first result should be the plugin we need.
Click the Install Now button on the Really Simple SSL plugin box.
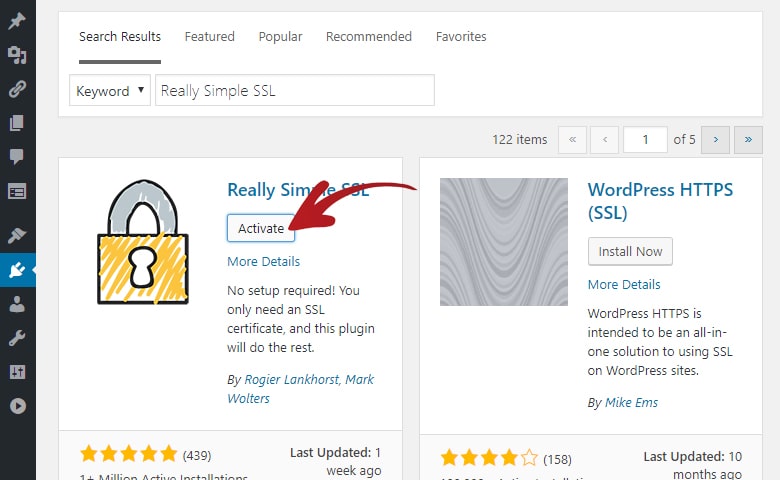
It will then start the installation process and as soon as it is done click the Activate button.
The page will then reload and you will be redirected to the Plugins page with this large info box.
Click the Go ahead, activate SSL! button inside the large info box.
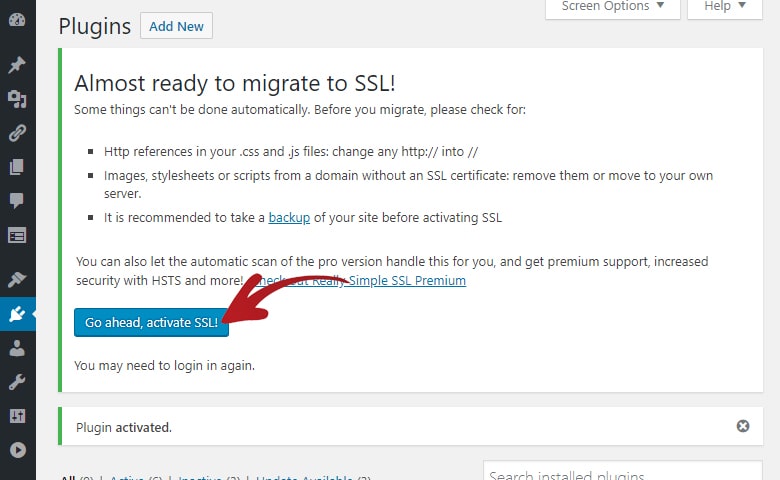
That is it!
You can now visit your domain and you should be automatically redirected to the HTTPS secured URL.
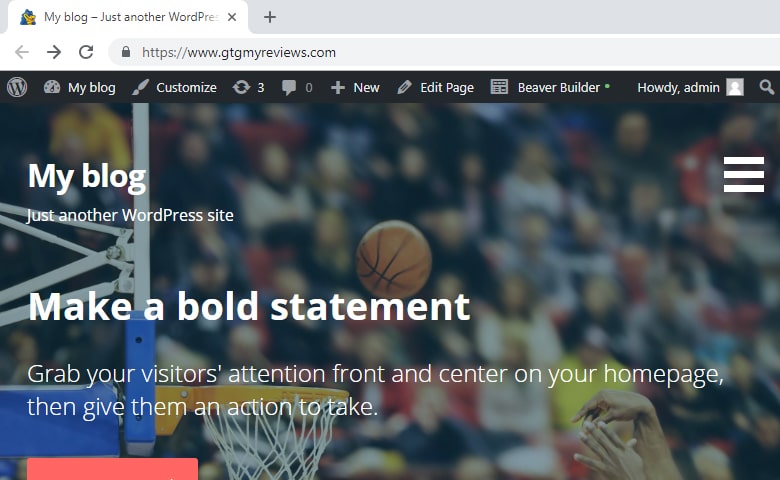
Happy blogging!
Conclusion
That is your step-by-step guide on how to get a free SSL for GoDaddy.
If you don’t have an SSL yet and the only reason that is holding you back is that you do not have a budget for the SSL yet.
Then there is no reason not to get a free SSL from Let’s Encrypt for now.
You can always switch to your paid SSL later once you bought a paid one.
The important thing is you secure your website right away to get the security benefits and make you visitors feel secure as well.
Also to get rid of the not secure message in the browsers URL box. In Windows Edge it is not that intrusive.
But in Google Chrome it is very visible and will definitely make your visitor feel not secure.
Yes, this is Google’s low key way of pushing bloggers to buy SSL for their websites.
If you are in HostGator then you might be interested in reading my step-by-step guide on how to get a free SSL for HostGator instead.