

If you are interested to find out how to start a blog with DreamHost. Then you have come to the right place.
It will be no surprise for me if you are interested in hosting your new blog website with DreamHost.
DreamHost is also one of the popular web hosting providers that has been around for a long time.
Currently DreamHost has 1.5 million websites under their banner and they claim to have one of the best uptime in the market.
The other interesting thing about DreamHost is that they are also officially recommended by WordPress.
DreamHost offers shared hosting, VPS hosting, Dedicated hosting, Cloud hosting, WordPress hosting and WooCommerce hosting.
In this particular guide, we will be using their cheapest shared hosting plan.
Here is your step-by-step guide on how to start a blog with DreamHost.
1. Purchase Shared Starter Plan
The very first step is to go to the DreamHost Shared Hosting page.
Once you opened the page, scroll down and choose between Annual Hosting and Monthly Hosting.
In my case, I chose Monthly Hosting.
If you want to pay less for each month, you might want to consider Annual Hosting.
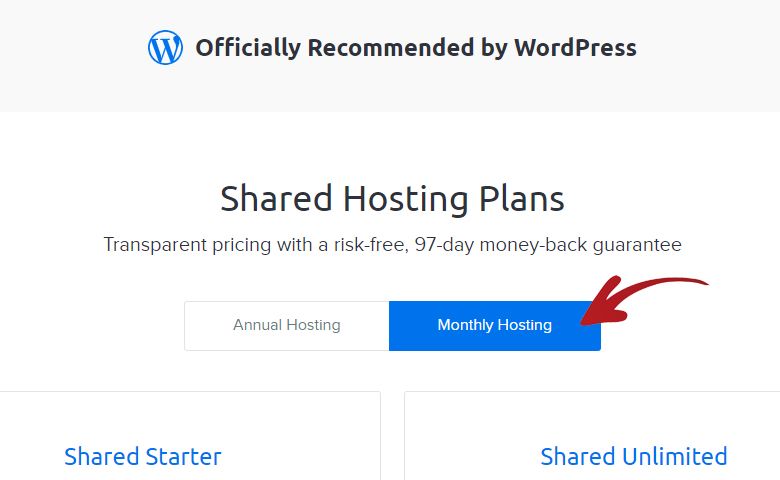
The next step is to scroll down and choose which hosting plan you want to purchase.
In this article, we will purchase the Shared Starter hosting plan.
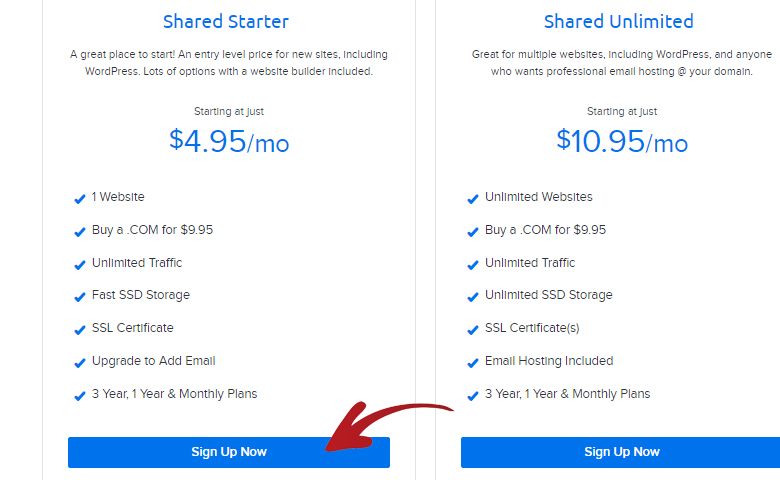
To initiate the purchase, click the Sign Up Now button under the Shared Starter hosting plan.
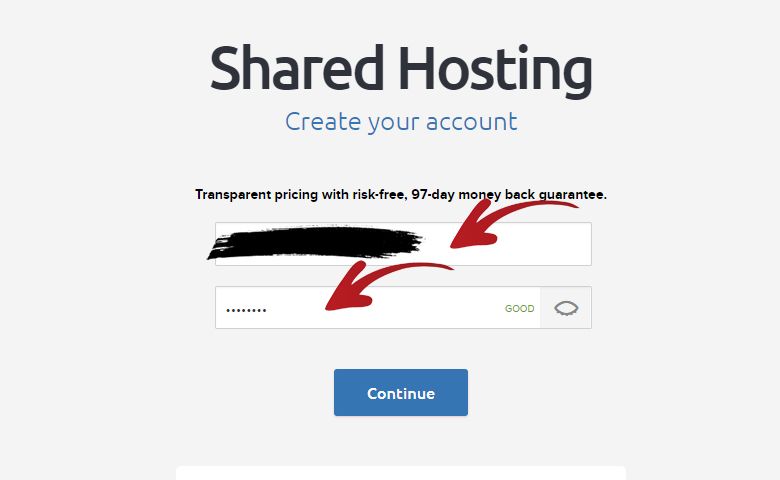
You will be redirected to a page where you will need to type in your Email Address and preferred Password.
After you filled up the input fields above you can click the Continue button.
2. Purchasing or Adding Existing Domain
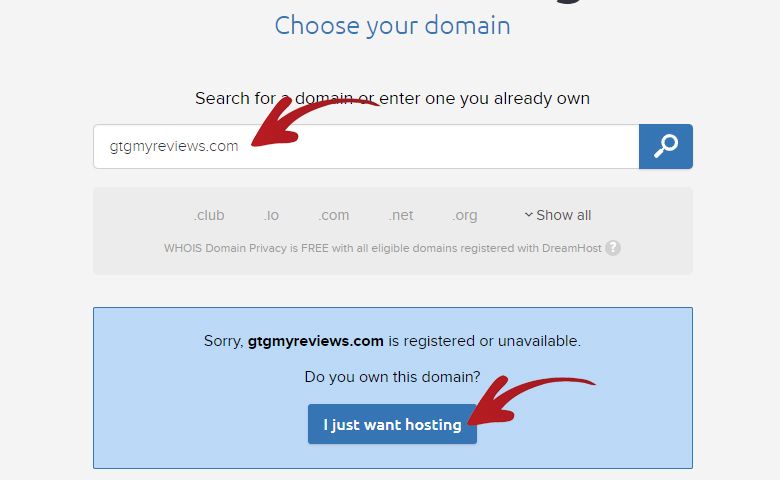
In the next step, it will ask you if you want to purchase a new domain and type in a domain you already owned.
If you want to purchase a new domain.
Type your new domain in the input field. If it is available, you will see a Register Now button.
Click on the Register Now button to add it to your purchase.
In my case I already owned a domain from another registrar. After I typed in my already existing domain.
All I had to do is click the I Just Want Hosting button.
3. Billing
You will then be redirected to a page where it will asks you how you wanted to be billed.
In my case, I chose the Monthly option.
The monthly price is lower if you purchase the 1 Year plan or 3 Years plan so you might want to consider those.
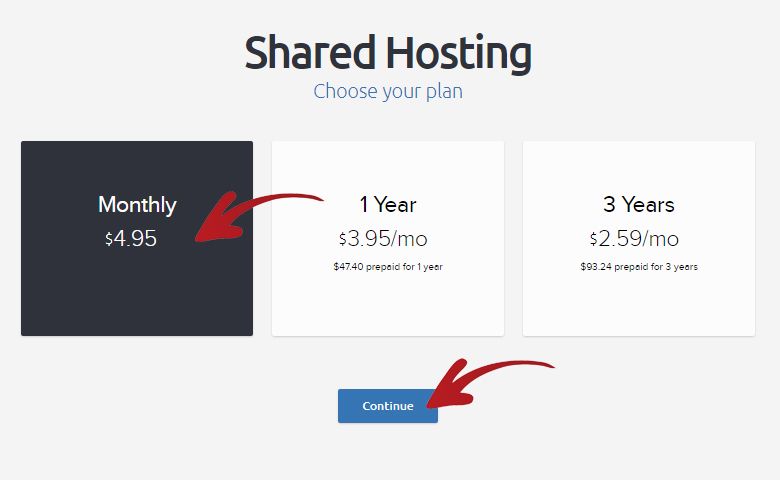
After you choose your plan, you can now click the Continue button.
On the next page, you will be asked if you want to Install WordPress.
I checked the Get WordPress Free with Your Plan checkbox.
I keep the WordPress Migration Service unchecked.
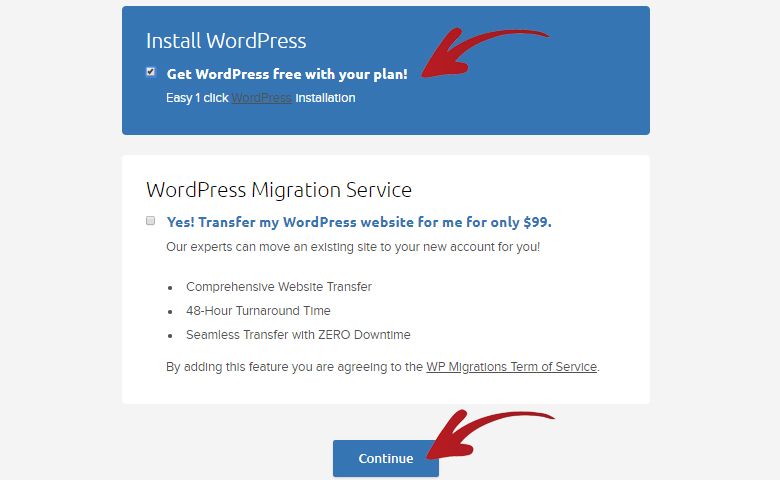
After this, I clicked the Continue button.
4. Finishing Your Purchase
You will then be redirected to a page where you will need to fill-up your billing information.
In the the About You section, you will need to fill-up your Full Name and Billing Address.
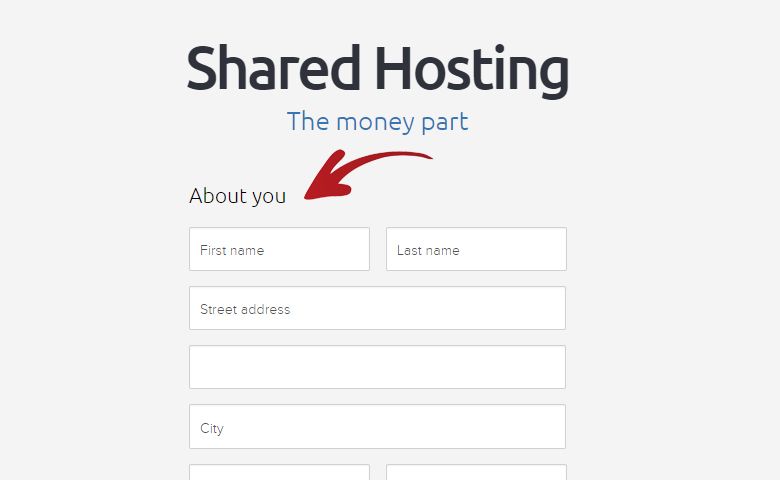
After you filled-up your Full Name and Billing Address.
You will need to scroll down to the Your Credit Card section.
Click on the Add Credit Card button to unlock the input fields for the Credit Card details.
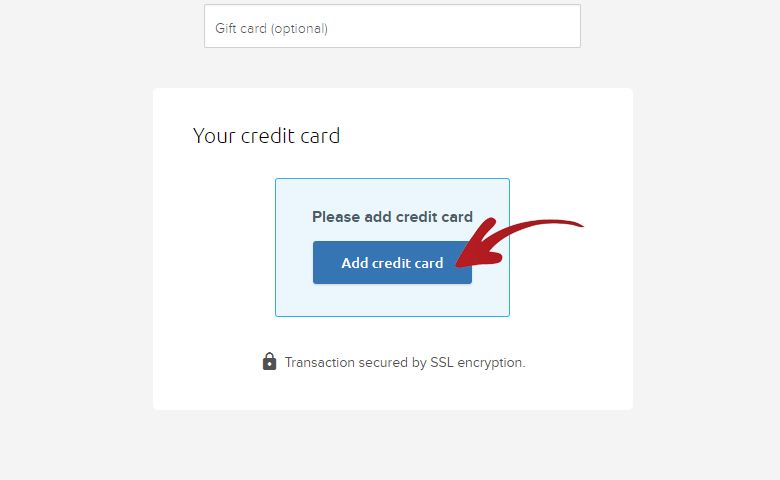
After you filled-up you Credit Card details. Click the Use Credit Card button to lock it in.
Finally scroll down until you see the Place Order Now button.
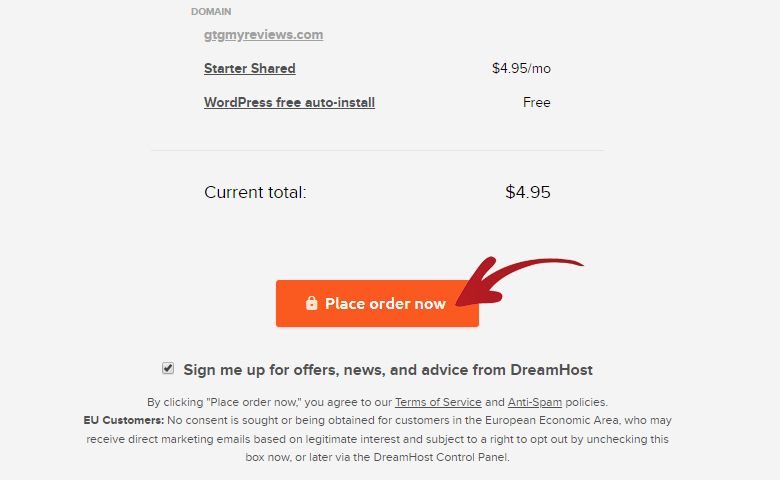
Click on the Place Order Now to finish your purchase.
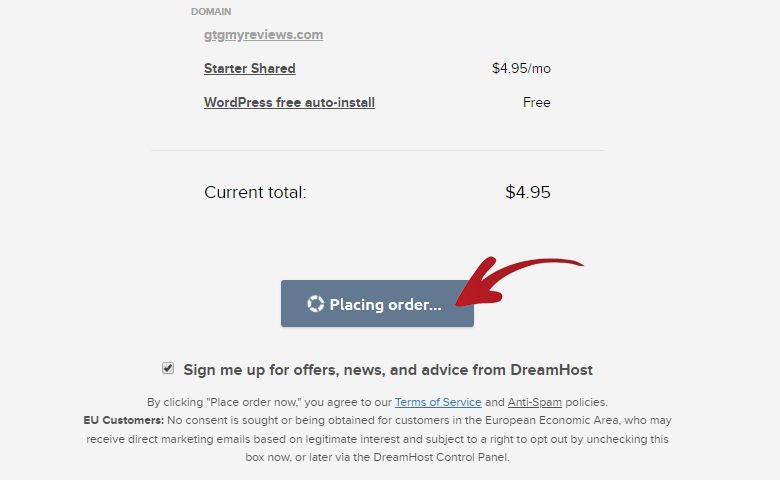
You should see this loading button which means your order is being processed.
Just wait for it to finish processing.
As soon as the order finished processing.
You will be redirected to this page.
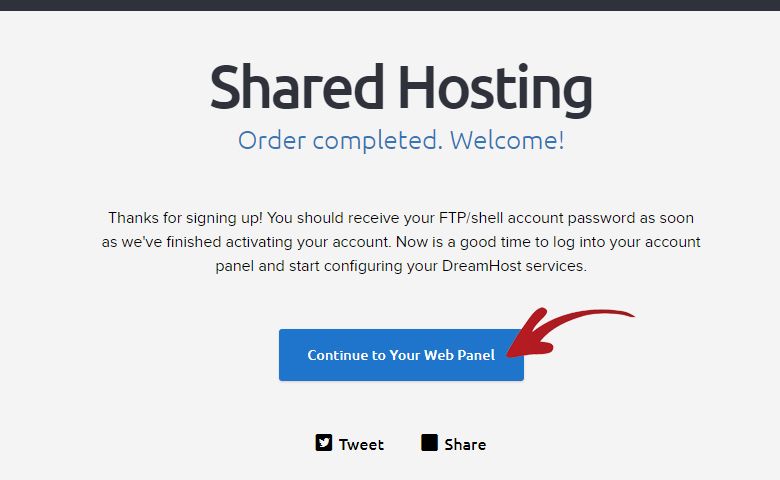
Click on the Continue to Your Web Panel button.
5. Logging Into The Control Panel
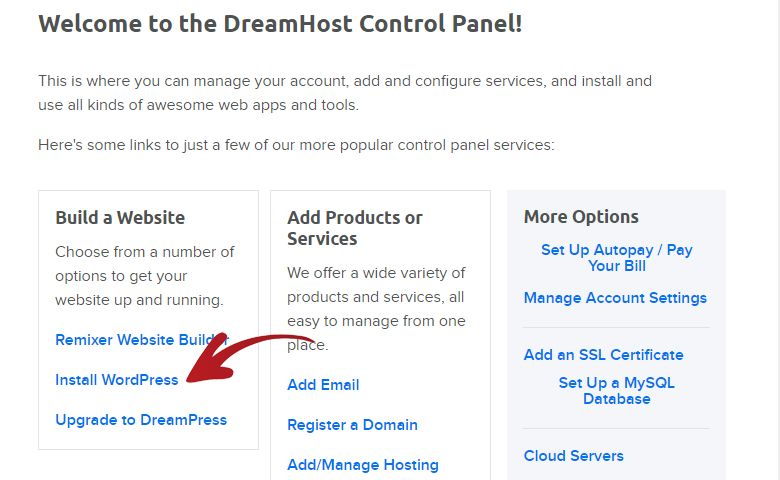
You will then be redirected to this page which is basically your Control Panel.
In this page you will be able to control your domain, hosting, databases, billing, mail, be able to purchase other services of DreamHost etc.
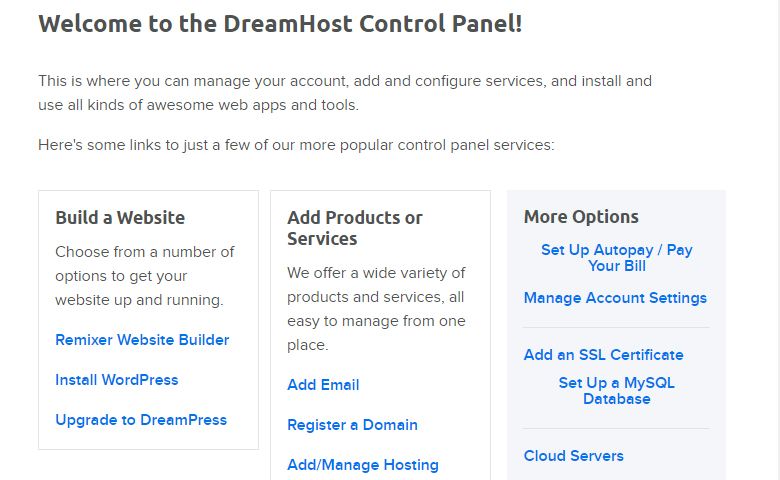
For now we will focus on getting WordPress installed into our hosting.
6. Installing WordPress
In most cases, you will not need to install WordPress anymore as we chose to install WordPress automatically when we purchased our hosting plan.
But in case you didn’t choose to install it automatically.
Here is the step-by-step on how to install WordPress in DreamHost.
The first step is to click the Install WordPress link.
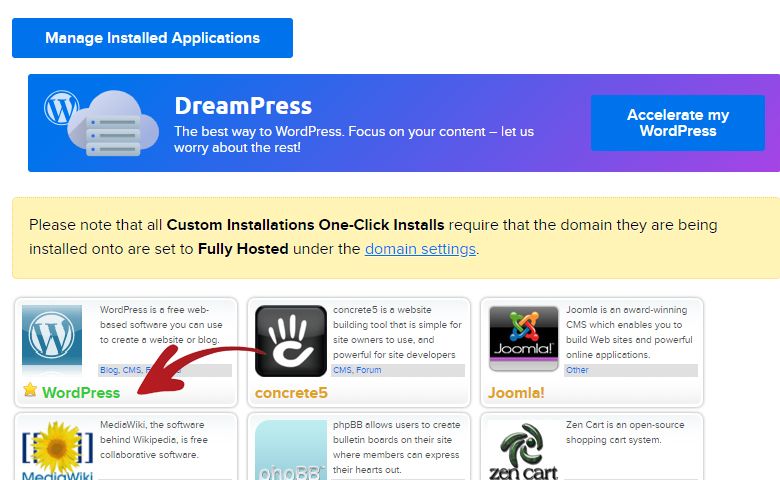
You will then be redirected to a page where you can choose different applications that you can install in your hosting.
In our case, we just want to install WordPress so just click on the WordPress link.
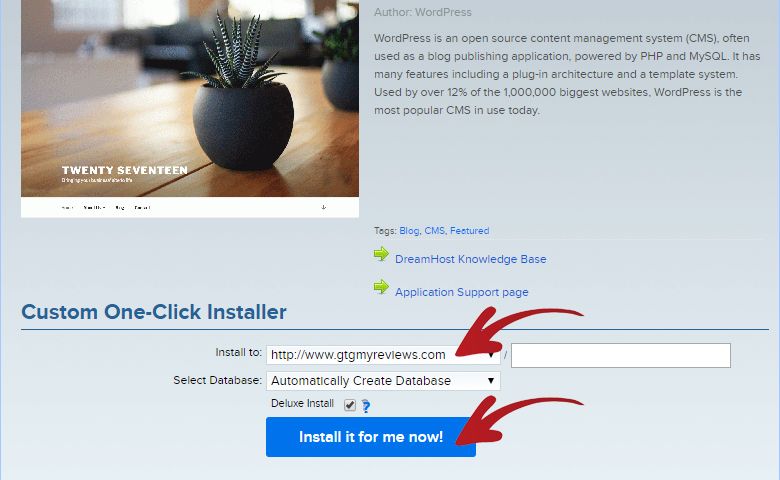
A popup box will then show which will allow you to choose the domain where you want to install WordPress.
Click the Install To dropdown and choose the domain name you want to install WordPress to.
In my case, I chose my www.gtgmyreviews.com domain.
After this, I clicked the Install For Me Now! button.
You will then be redirected to this page which says that your WordPress installation will be done within 10 minutes.
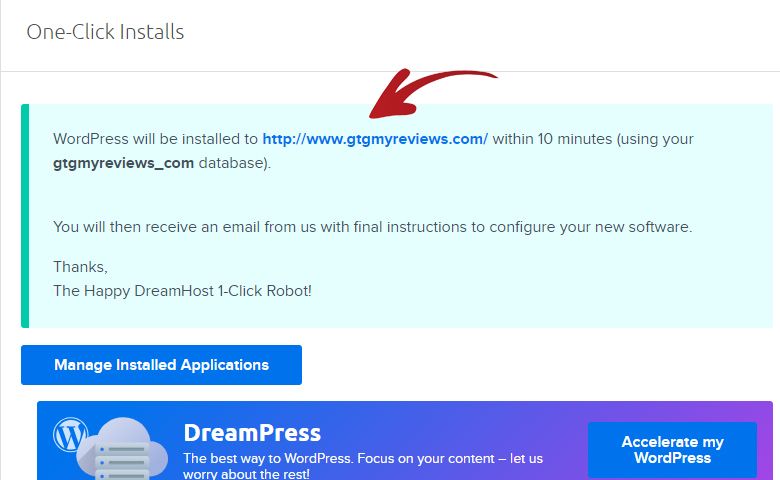
As soon as the WordPress installation is finished.
You will receive an email containing the information about your WordPress installation.
Go to your email and look for the email similar to the image shown below.
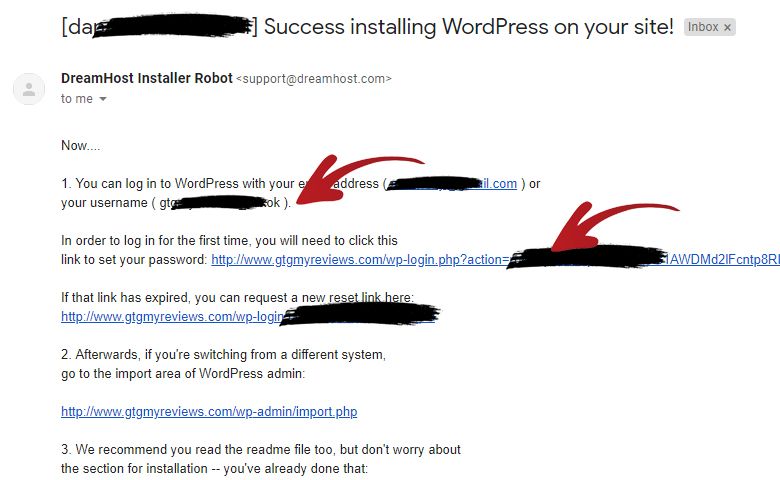
As soon as you received this email, take note of your Username which is either your Email Address or the text inside the close and open parentheses.
After you take note of your Username, click on the Link To Set Your Password link.
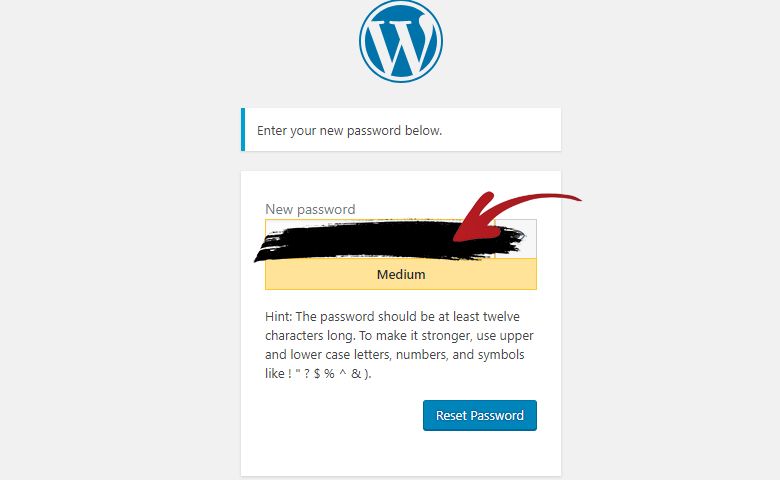
You will then be redirected to this page where you can input your preferred Password.
After entering your preferred password, click the Reset Password button.
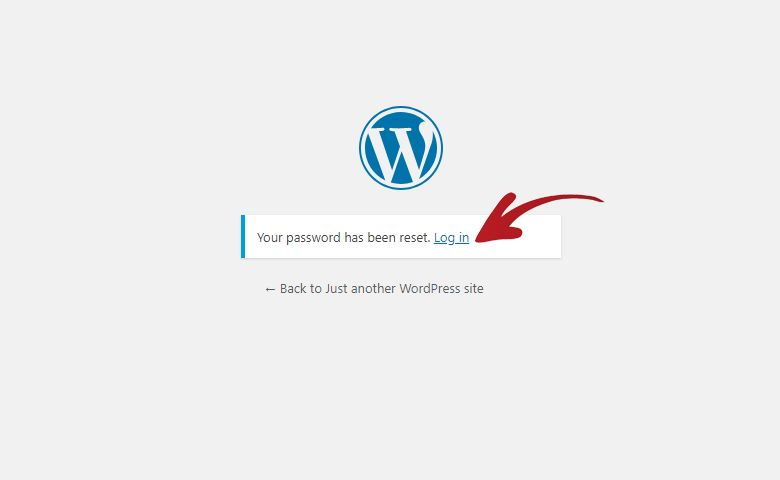
You will then be redirected to this page confirming that your password has been reset.
It also has a link to the WordPress login page.
Click on the Log-in link if you want to go and log-in to your WordPress dashboard.
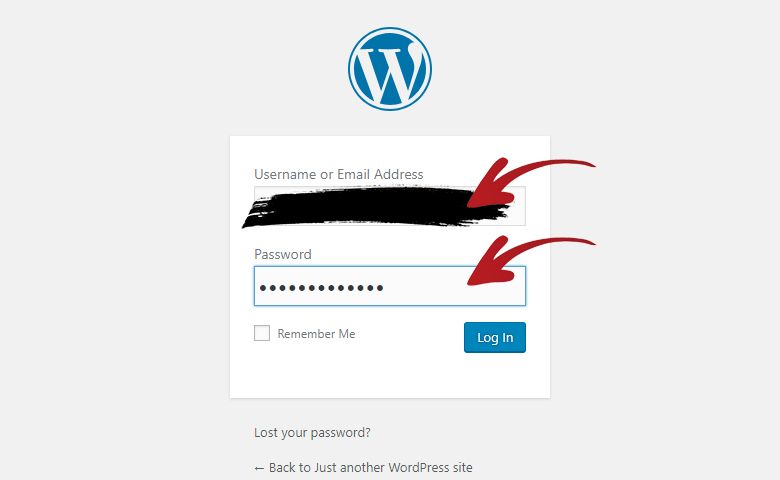
It will redirect you to your WordPress log-in page.
Use the Username you take note of earlier and use the Password you just setup in the previous step.
If you logged-in successfully you should be redirected to your WordPress dashboard page.
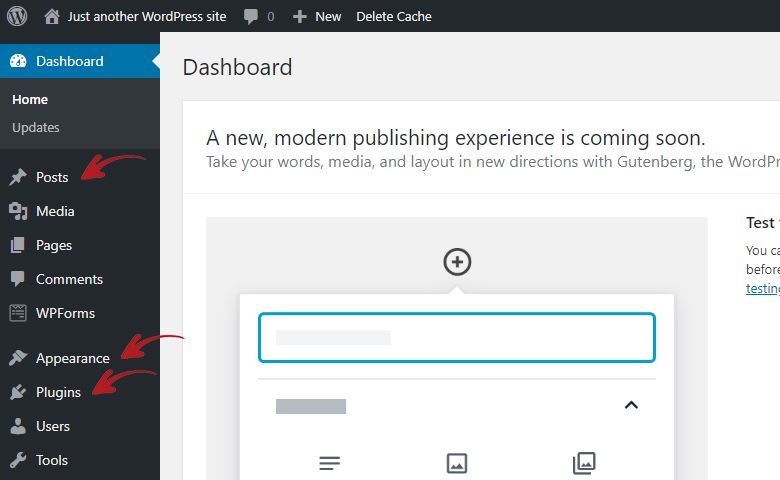
That is it, you can now start adding new posts on the Posts section.
Or you can start redesigning your website by installing a new theme through the Appearance > Themes section.
Or maybe you want to start installing new plugins through Plugins > Add New section.
7. Visiting Your Blog Website
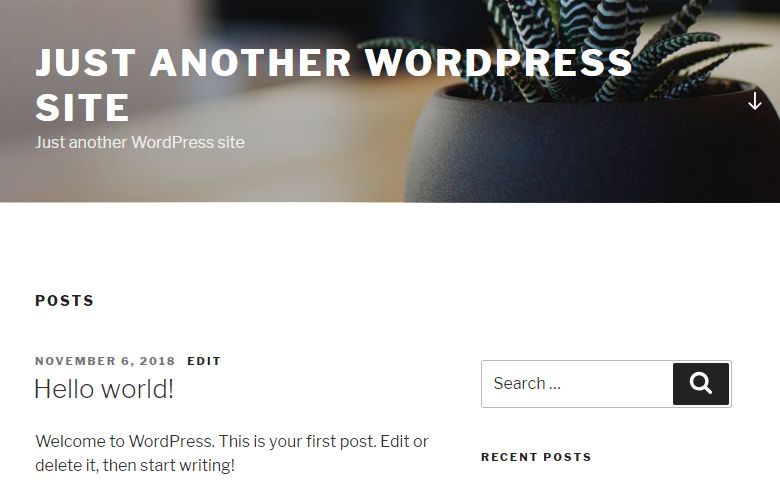
You can also now visit the frontend of your WordPress.
You can do this by visiting the new domain name that you purchased with your hosting.
It should look like this with the default theme.
However, if you did not purchase a new domain with your hosting from DreamHost.
Then you will need to do the steps below in order to point your existing domain to your DreamHost hosting.
8. Pointing Domain to DreamHost
The very first step in order to point your domain to DreamHost is to find out your DreamHost nameservers.
You can find these by going to the emails sent to you by DreamHost.
The specific email you need to find has a subject named DreamHost Account Approval Notification!
The section in this email you need to find looks like the image shown below.
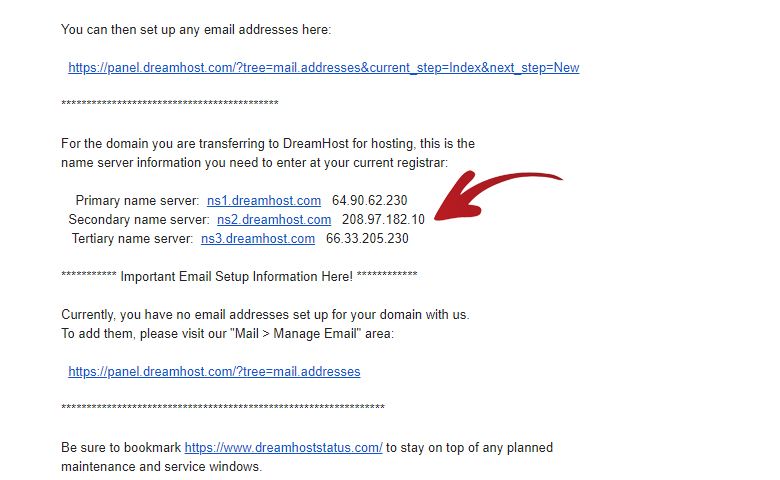
In the image above, you can see the nameserver sections.
My nameservers are as follows:
- ns1.dreamhost.com
- ns2.dreamhost.com
- ns3.dreamhost.com
9. Updating Namerservers In Your Domain Registrar
The next step I needed to do is log-in to my domain registrar.
In my case my domain registrar is GoDaddy. But the steps should be pretty much the same in other domain registrars.
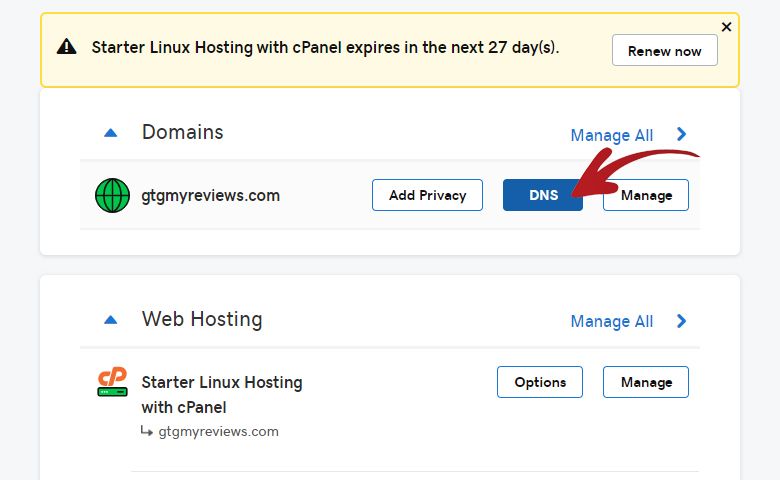
Once I am logged-in to My Account section in GoDaddy.
I immediately got access to my domain name. On the right side of it I just needed to click the DNS button to get access to my nameservers.
I am then redirected to this page where I can now change my nameservers.
All I had to do is click the Change button under the Nameservers section.
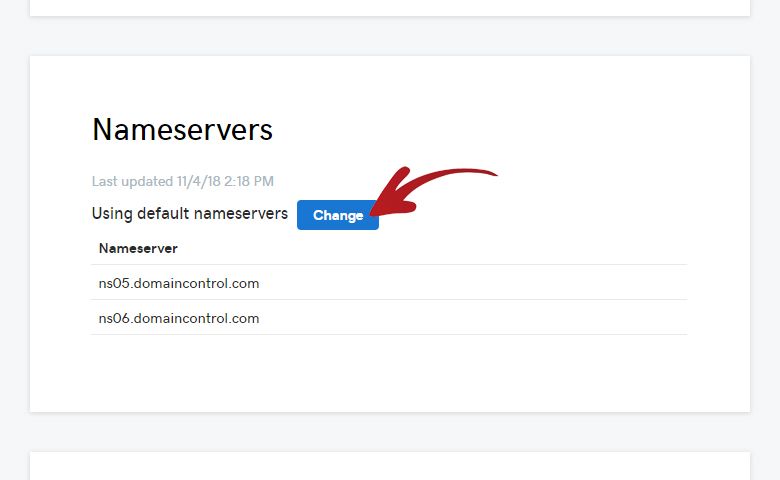
It then gave me a dropdown option to Choose Your New Nameserver Type.
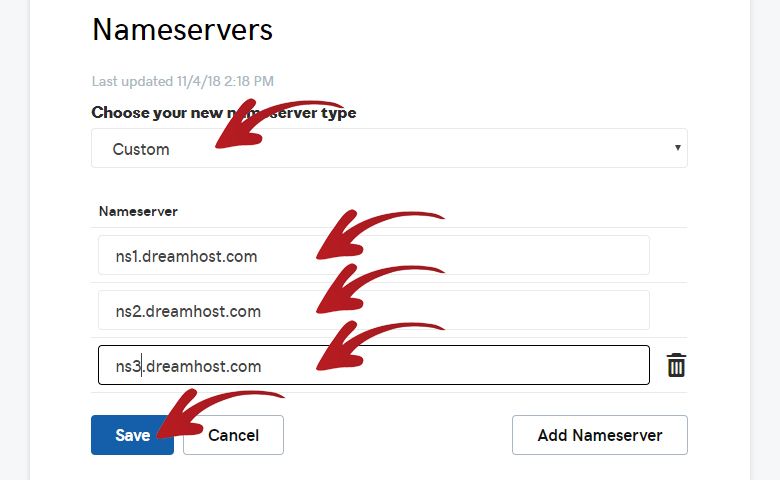
I chose Custom and it then gave me input fields where I can type-in my new nameservers.
I just typed the DreamHost nameservers then clicked the Save button
That is it! It then redirected me to this page which now shows the new nameservers.
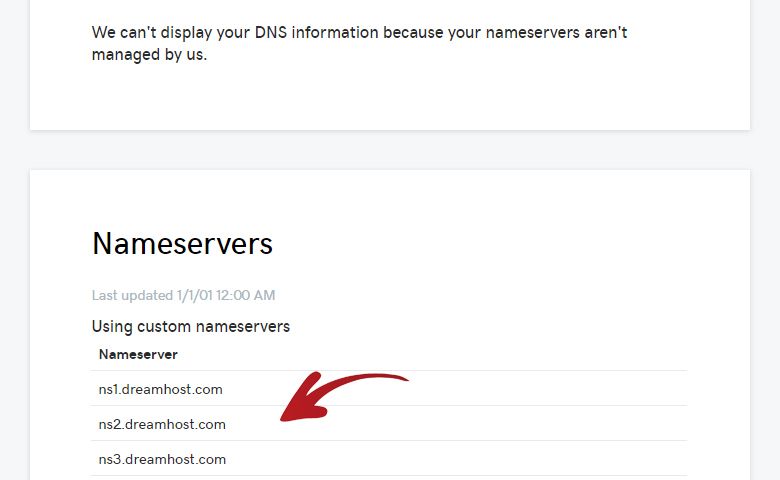
I just needed to wait a few hours for the DNS to fully propagate.
Once the DNS propagation is done. I am now finally able to access my DreamHost hosting through my domain name.
Conclusion
You cannot really go wrong with DreamHost if you want to host your new blog website with them.
Even WordPress highly recommends DreamHost as a web hosting.
The other great thing about DreamHost is they allow monthly subscription unlike its competitors who requires you to pay a year in advance.
This allows new bloggers in a budget to start their new blogs with just a couple of bucks in their pocket.
Once you start redesigning your WordPress installation, you might want to look at my list of best WordPress themes for 2018.