

In this article I will show you a step-by-step guide on how to start a blog with NameCheap.
If you are a starter blogger and planning to start your own blog. Then you might want to consider the NameCheap shared hosting.
The best thing about NameCheap is that their lowest shared hosting plan named Stellar only costs $2.88/mo and their .com domain only cost $8.88/year which is really cheap.
They also currently offer a .website extension for free if you purchase a Stellar shared hosting pan so you can literally start your own blog right now with just a $2.88 budget.
This means that if you are a starter blogger then you can start with a really low budget. And just upgrade if necessary once your website started to gain traction and more visitors.
Here is the step-by-step guide on how to start a blog with NameCheap.
1. Purchase Stellar Plan and Domain
The very first step is to go to NameCheap shared hosting page and Add to Cart the Stellar plan.
On the next page, you will be given a choice whether you want to:
- Claim your free .website domain
- Purchase a new domain
- Use a current domain you own in NameCheap
- Use a domain from another registrar
In this example we will purchase a new domain. If you do the same your cart should look something like this.
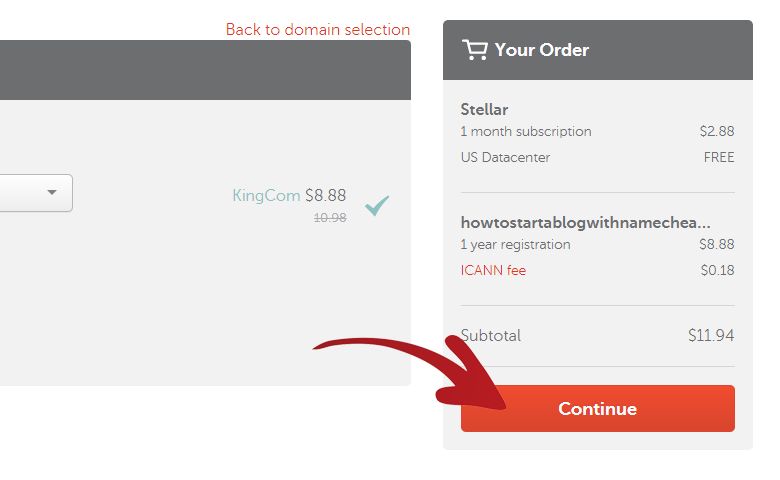
Just click Continue and proceed to purchase the Stellar plan and your new domain.
2. Login to Your cPanel
Once you purchase the Stellar plan and your new domain. You will receive an email containing your server host login credentials.
The important details on these are the cPanel username and cPanel password.
Once you take note of your cPanel username and cPanel password. You will need to go to your cPanel login page.
Your cPanel login page will look like something this:
http://howtostartablogwithnamecheap.com/cpanel/
Basically it is your domain name followed by /cpanel at the end.
Go to your cPanel login page and login using the cPanel username and cPanel password you received in your email.
3. Install WordPress
Once you are inside the cPanel, go to the bottom of the page and you will see the Softaculous Apps Installer section and under it is the WordPress icon.
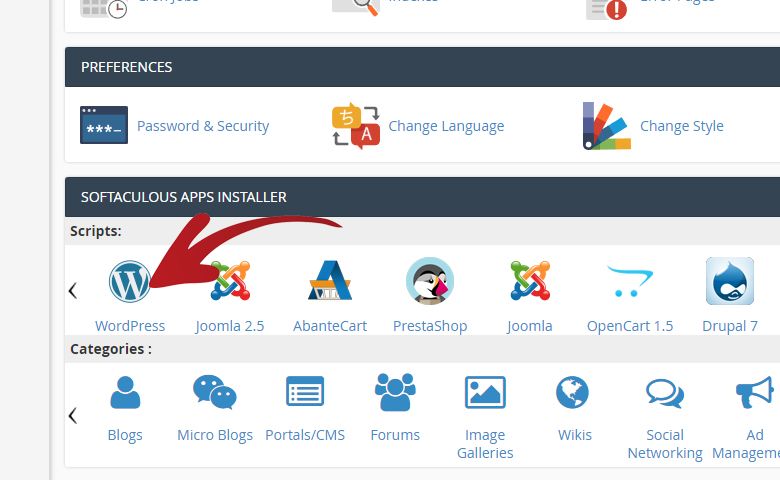
Click on the WordPress icon to start the installation of WordPress.
On the next page you will see something like this:
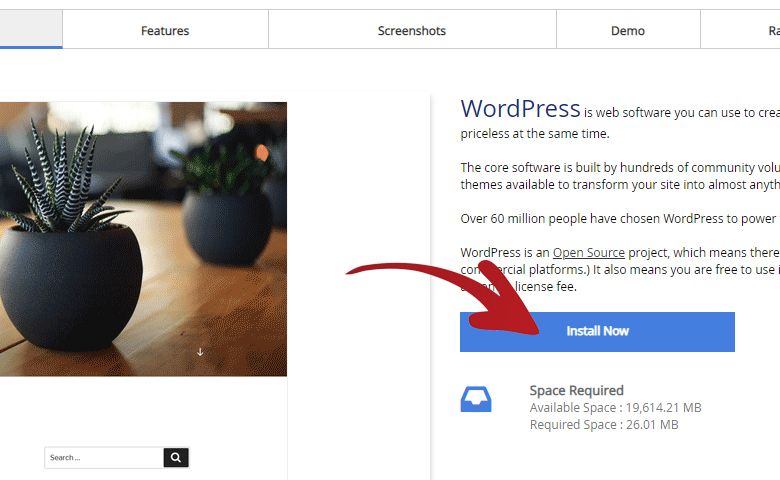
Just click on the Install Now button to proceed to the next page.
On the next page, you will be able to:
- Choose which domain you want to install WordPress
- Add your Site Name
- Add your Site Description
- Set your WordPress Admin Username
- Set your WordPress Admin Password
- Add your Admin Email
- Choose Language for your Blog
- Install plugins like Loginizer, W3 Total Cache or WP Super Cache
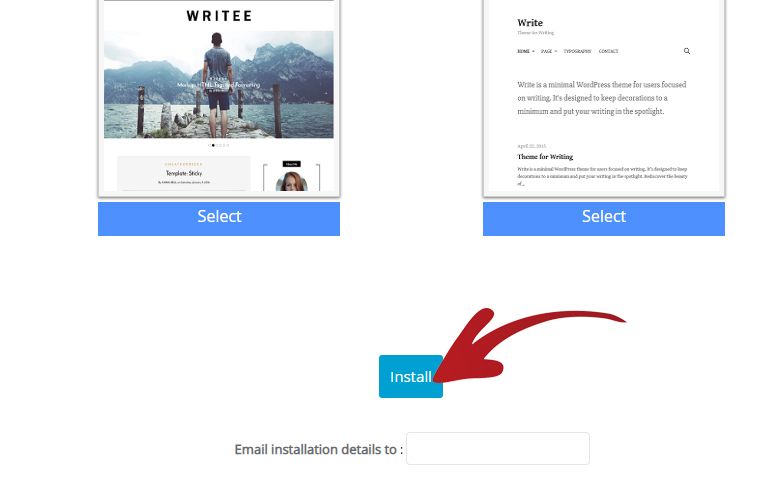
- Select your WordPress Theme
Once you setup everything above you will just need to click the Install button at the very bottom of the page.
After you click Install, it will show you a loading bar saying it will take 3 to 4 minutes to finish the installation. But the reality is it will only take a few seconds.
After the installation is finish you will see this page:
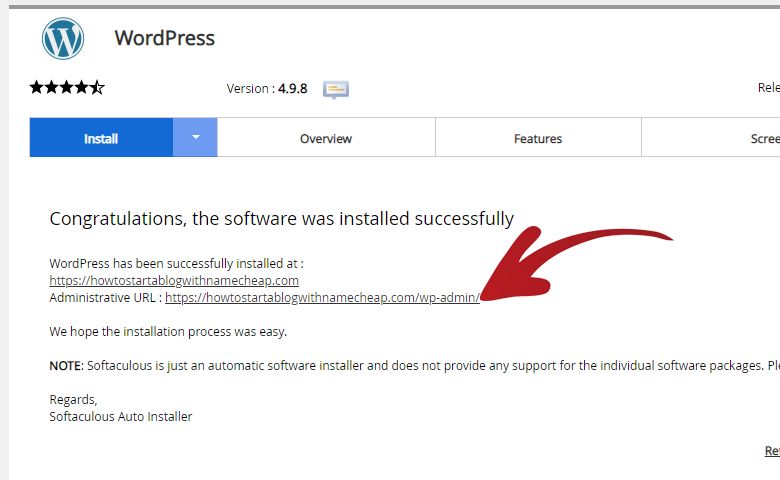
In this page you can see your domain which now has WordPress installed. So if you click on it you will see the front page of your website.
The link below it is your WordPress admin login page. If you click on it you will be redirected to your WordPress login page and you can use your WordPress admin username and admin password to login.
These are the credentials you setup in the previous step.
Conclusion
That is your step-by-step guide on how to start a blog with NameCheap.
It is very easy to do and very cheap as well.
As for performance, I am able to attain 100/100 in Google PageSpeed after I fully optimized my website.
This is pretty outstanding considering it is a shared hosting.
The only issue is that sometimes the server response time drops to more than 300ms so when this happens the Google PageSpeed score also drops but still remain in the 90s.
All in all the Stellar plan is very good for a starter blogger and it will not hurt your pocket.
After you installed your WordPress blog you might want to consider installing my recommended plugins.